Messy Bun Hat Crochet Pattern
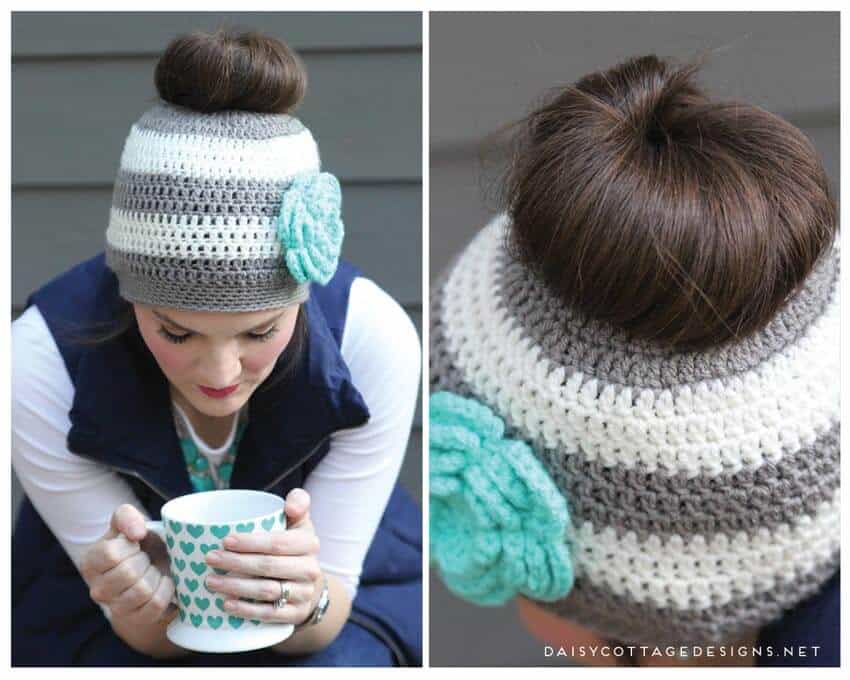
Last week, a “new” thing in crochet went viral. Although it wasn’t really new at all, the messy bun hat is the hottest thing in crochet at the moment. Also called the ponytail hat (among other things), it’s a great way to keep your head warm without having your hair stuck up under your hat.
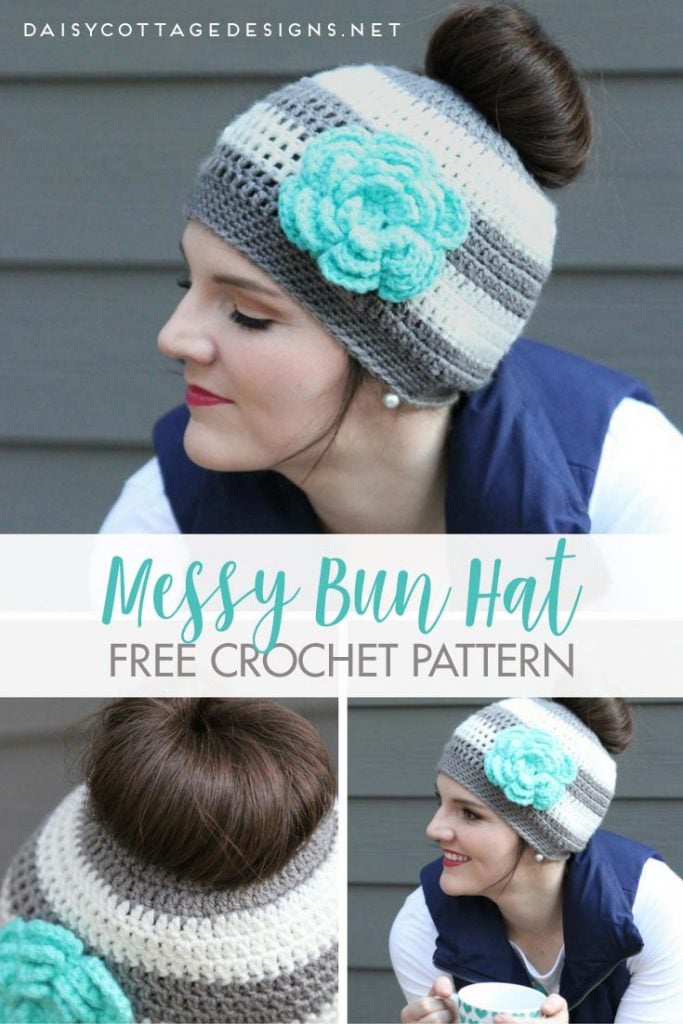
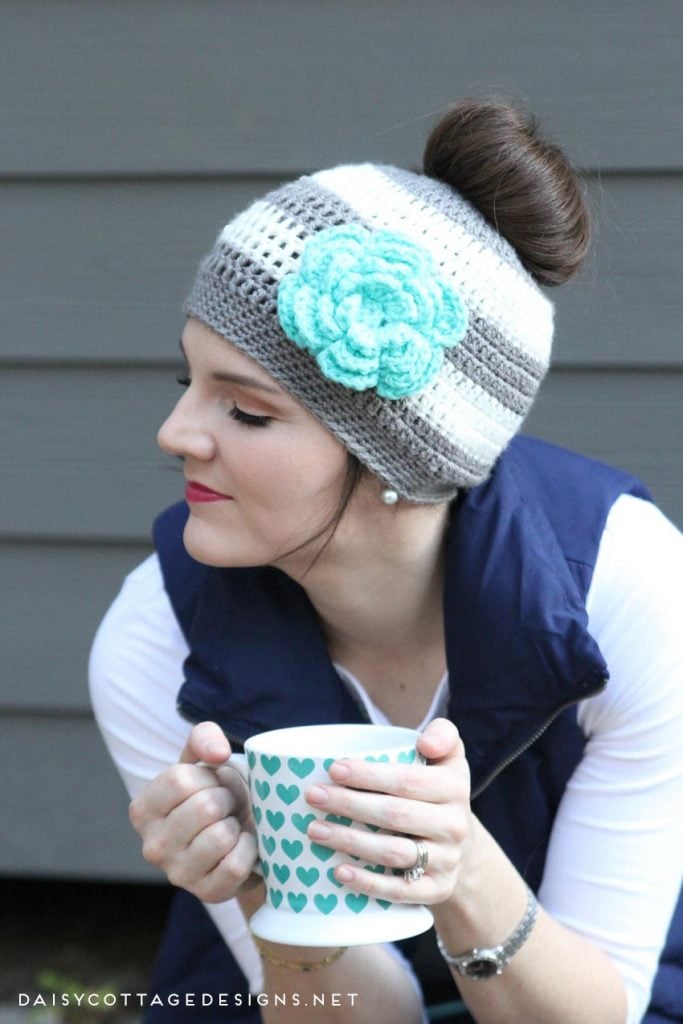
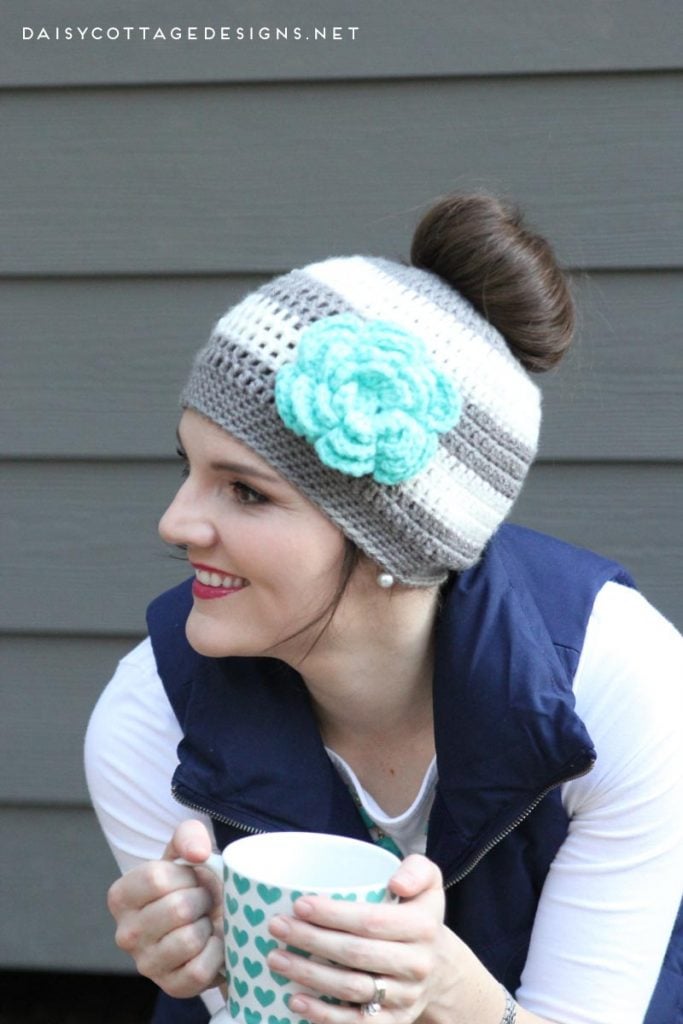
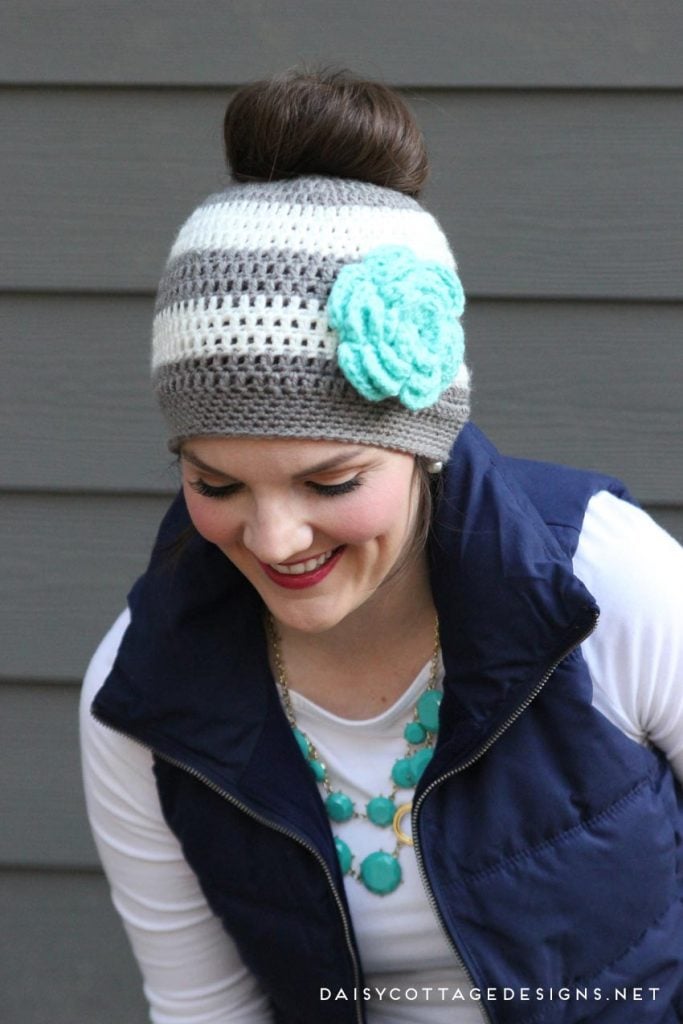
I had to get in on some of the fun, so I created this striped ponytail hat crochet pattern. I love that it’s worked in the round and from the top like a traditional crochet hat and that you begin by working around a hair elastic so it can easily fit around your bun and keep its shape.
When I made this messy bun hat, I used stripes, of course. As I may have mentioned a time or 10, I love stripes. If you’re looking for more adorable striped crochet patterns, All Free Crochet is a great resource.
Other Messy Bun Free Crochet Patterns:
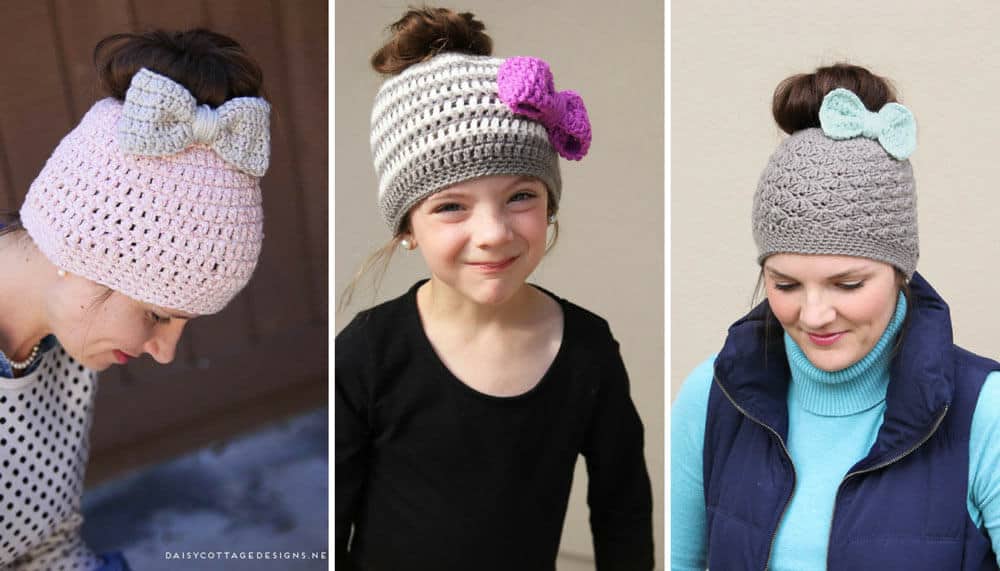
- Kids Messy Bun Crochet Hat Pattern
- Chunky Messy Bun Crochet Beanie Pattern
- Shell Stitch Messy Bun Crochet Hat Pattern
Can’t crochet this hat right now?
- Pin it for later!
- Find more free crochet patterns!
- Click here to queue or favorite on Ravelry
Messy Bun Hat Crochet Pattern: For Women & Girls
Want to purchase an ad-free PDF of this hat? The adult and child size are included along with the bow and flower pattern! Click here to purchase those patterns!
Materials:
- Worsted Weight yarn in two colors (if you want a stripe pattern… if not, just one adorable color)
- I Crochet Hook (I used my I hook from this set)
- Tapestry needle
- Double Knit Yarn for flower
- Large flower crochet pattern
To begin this ponytail hat crochet pattern, you’ll be working into a normal ponytail elastic. I recommend using several of the thin elastics rather than one fat one. That way, if one of them snaps (I have thick hair so I get elastics snapping regularly), your hat will still be perfectly fine and good to go.
Updated Note (12/18/16): Lisa from a FB group I’m in suggested creating a chain loop the same size as the ponytail elastic. That way, if you’re hair tie snaps, your work will still be intact! Fantastic idea.
Important Notes:
- By request, I have created a video tutorial for beginning this hat. Find that video here.
- At the end of each round, make sure you’re working into the first REAL double crochet and not the top of the ch 2. You work an extra stitch into the beginning of each round so you don’t have to work into the sl st.
For those whose hat is too big:
This hat is not meant to be worn with a bun that’s right on top of the head. If you want to wear the hat that way, you’ll definitely have to leave off a few rows. As you can tell in the picture below, my bun is more in on the back of my head (still towards the top). So, my hat is not pulled straight down on my head, but is angled towards the back. I have counted and recounted, made and remade this hat to be sure the stitch counts are correct.
If you have a tendency to crochet loosely, I definitely recommend going down a hook size or two.
If you’re making a hat for a young teenager or an adult with a smaller head, you could also use the kids hat pattern as it will be just one size smaller than this hat.
Gauge Swatch
(ch 2 DOES count as your first stitch in the swatch):
ch 11.
Row 1: dc in the third chain from hook and in each stitch across. Ch 2, turn. (10)
Row 2-6: dc in the second stitch and in each stitch across. (10 – including the ch 2)
This swatch should approximately measure 3” x 3”.
Messy Bun Hat Pattern
Round 1: Sl st around the ponytail elastics. Ch 2. Work 33 dc around/into (not sure which terminology makes sense). Sl st to the top of the first dc (NOT into the chain 2). Ch 2. (33) (If you want to see a video tutorial of how to do this, you can find that here.)
Round 2: 1 dc into the same stitch and the next stitch, 2 dc into the next stitch. *1 dc into the next 2 stitches, 2 dc into the next stitch* around. Sl st to the top of the first dc. Ch 2. (44)
Round 3: 1 dc into the same stitch and the next 2 stitches, 2 dc into the next stitch. *1 dc into the next 3 stitches, 2 dc into the next stitch* around. Sl st to the top of the first dc. Ch 2. (55)
Round 4: 1 dc into the same stitch and the next 3 stitches, 2 dc into the next stitch. *1 dc into the next 4 stitches, 2 dc into the next stitch* around. Sl st to the top of the first dc. Cut yarn and weave ends. (66)
Round 5: Join second color yarn using your preferred method. Ch 2, dc into each stitch. Sl st to the top of the first dc. Ch 2. (66)
Round 6: dc in each stitch. Sl st to the top of the first dc. Ch 2. (66)
Round 7: dc into each stitch. Sl st to the top of the first dc. Cut yarn and weave ends. (66)
Round 8: Join first color yarn using your preferred method. Ch 2, dc in each stitch. Sl st to the top of the first dc. Ch 2. (66)
Round 9: dc into each stitch. Sl st to the top of the first dc. (66)
Round 10: dc into each stitch. Sl st to the top of the first dc. Cut yarn and weave ends. (66).
Round 11: Join second color yarn using your preferred method. Ch 2, dc into each stitch. Sl st to the top of the first dc. Ch 2. (66).
Round 12: dc into each stitch. Sl st to the top of the first dc. ch 2 (66)
Round 13: dc into each stitch. Sl st to the top of the first dc. Cut yarn and weave ends. (66)
Round 14: Join first color yarn using your preferred method. Ch 2, dc into each stitch. Sl st to the top of the first dc. Ch 2. (66)
Round 15: dc into each stitch. Sl st to the top of the first dc. Ch 1.
Round 16-20: sc into each stitch. Sl st to the top of the first sc. Ch 1. (66)
Round 21: sc into each stitch around. Sl st to the top of the first stitch. Cut yarn and weave ends. (If you prefer to use the invisible finish method, omit slip stitch to the top of the first sc.) (66)
That’s it! You’re finished with your ponytail hat crochet pattern (or messy bun hat, whichever you want to call it). Keep reading for instructions on the flower.
To make the adorable flower embellishment for your messy bun hat, I used this large flower crochet pattern. I made it using two strands of double knit yarn and did an extra round to make it bigger. I also think it would be adorable to use a HUGE bow on the side. Use this large bow crochet pattern (find the bow pattern in the middle of the post… it comes after the headband). This bow pattern is also adorable!
Want to make this for a younger girl? Find the free kid’s ponytail hat pattern here.
A very special thank you to my friends Merissa & Nicole for helping me with my photoshoot for this ponytail hat crochet pattern. We had a great time getting dolled up and doing the styling for this shoot. I’m not usually very confident in front of the camera, and would rather not model my stuff, but they made me feel more comfortable than usual. I’d love it if you’d stop by and say hello to them!


This truly came out beautifully! You did an amazing job creating the pattern for this. I had so much fun doing your makeup & working with you. Always a pleasure 🙂
Is there a visible seam?
The seam is slightly visible, but it’s hardly noticeable because we’ve worked in an extra dc in each round 🙂
This came out so cute, Lauren! I know you worked hard on it. It definitely stands out and is a must have for anyone who enjoys winter sports.
Thank you so much for the patterns!
I love your patterns but I really wish you would include gauge info
Hi, Jennifer. Just added a gauge swatch to the pattern. 🙂 Thanks for the suggestion.
I got to row 10 and it all ready down to my ears. What did i done wrong.
Hi, Erica. If I wear this hat straight on my head, it’s long… but, when my bun is “on” and towards the back of the top of my head, it pulls the brim up and just as it’s shown in these photos. Hope that helps 🙂
Thank you for sharing your pattern. Can I make this into youth?
Hi, Verna. I did! The child’s messy bun hat pattern is available here.
Thanks so much, is it a toddler size?
This is the adult pattern, but a kid size is available here.
Omg could you be any cuter….and love this pattern thank you so much
Thanks so much, Brandy! I’m so glad you like it.
Thanks for the pattern. I am left handed and had no problem following it. It is beautiful. I had made a different one from a different, site and it was complicated to follow.
So glad you liked it, Nola!
I love this pattern! Is there a way I could make into a child size?
Hi, Megan! I posted a pattern for just that today. Here it is.
Thank you so much for sharing your skills. It will bring so much joy for anyone who is lucky enough to receive this hat. I have made two already and now on my third one. My 3 grandchildren have long hair and this will be ideal for them. So easy to follow and very precise. Thanks again and have a wonderful Christmas.
Thanks so much, Dilna! Glad you’ve found the pattern accurate.
Ok, sorry if this is weird, haha but what is the gauge swatch for. I didn’t follow there.
Thank you
Not weird at all! That will help you know what hook to use. If you use an I hook (like I did) and get something smaller than 3×3, you’ll want to go up a hook. If you got something bigger, you’ll want to go down a hook! Hope that helps.
Ok, so this is to see how the rows will turn out? Thank you,
Thank you for the pattern the hat is beautiful! What yarn did you use? I’m in love with the grey.
It’s Hobby Lobby I Love This Yarn in Greybeard 🙂
Ok, one more question from me, i am trying to make it now, so when you first start you say (33) so will this number include the chain 2 or is it 34 with the chain 2? Thank you,
It doesn’t include the ch 2. 🙂 So if you’re counting the ch 2, it’ll be 34. But, since you don’t work into it, I don’t count it.
What does swatch mean
A swatch lets you use the same yarn and hook and see if your hat will turn out the same size as mine. So, if you do the swatch and it’s smaller than my swatch, you’ll need to go up a hook. Similarly, if you find your swatch is larger than mine, you’ll need to go down a hook size. Hope this makes sense!
How many pony holders did you use
Well, I like to live dangerously, so I only used one. But, after I’d made the hat, I thought… hmm… what if this breaks? So at that point, I decided to use 3 in the future 🙂
Do you ch 2 at the end of row 1 after you sl st in the first dc?
You would! Did I forget that? I’ll go back and check.
Lauren, Can you please make a video of making this hat? My daughter has asked me to make her one and I am learning to crochet and at this time I cannot read a pattern but I can follow a video. I have searched and there are videos out there but none as beautiful as your hat. Thank you!
Ahhh! Linda, I need to make videos. I ordered a stand and will see if I can do it.
So how do I go from 10 stitches on the swatch to 33 on round 1?
Jessica, the swatch isn’t connected to the hat 🙂 It’s just a way for you to test your tension compared to mine and see if the I hook is the right size for you.
When you get to rows 6 & 7 do you count the chain 2 as part of the (66) stitches? I’m easily confused with simple instructions. Lol
No problem 🙂 The ch 2 does not count in your 66 stitches 🙂
Is this written in US terms or UK UK terms?
All of my patterns are in US terms 🙂
Thank you so much, for this pattern, I am starting row 5 and it is working out, I love when I can actually follow pattern,the numbers etc.
So glad that it’s working out for you! Happy crocheting 🙂
I am just going to start crocheting, is this going to be difficult for me to do for the first time? I bought hooks so I want to use the I hook, and then what does the numbers in () mean? How many times you crochet? Is there maybe a video I could learn on the terms and everything? Sorry I dont mean to be a bother. Thank You
Hi, Kristi. It’s an easy pattern! There are some great videos on YouTube for beginning crocheters, and I also have a post for beginning crocheters that has some tips, tricks, and easy crochet patterns. You can find that here.
So, I started to make this today, but I know I am doing it wrong because the hat kept getting increasingly large! Here are my questions:
1. Do you make 33 sl st on the pony tail holders and then crochet the dc into that? That is what I did, but I was unsure if that was correct.
2. When round 2 says “1 dc into the next 2 stitches, 2 dc into the next stitch* around,” I think I did this wrong as well. I read it as: do one dc, in the next stitch, do a dc, in the next stitch put 2 dc. But should I have done one dc after skipping a stitch and then two dc in one stitch?
Sorry, I’m not very experienced!! Thanks!
Hi, Lindsay.
1) No, you’re going to connect with a sl st and then do 33 dc into the hair tie.
2) you do a dc in one stitch, a dc in the next stitch, and then 2 dc in the third stitch.
Hope this helps!
Tried the pattern and for some reason it is way too big, covers my eyebrows and is saggy in the back. I tested the swatch and that is correct. Only difference is that I tried the crochet loop instead of the hair tie. Really dissapointing..
Hi, Amanda. I’m sorry that you’re having trouble with he sizing. Did you work up the gauge swatch? Also, be sure that you’re not working into the ch 2 at the end of each row. If you work into that stitch, you’ll end up with an extra dc each round and have a hat that gets huge 🙂
So I tried it with elastic instead of the chain circle and went down a size hook and it came out awesome!! Can’t wait to make more!
I’m having a hard time maybe my head is small for a woman but using an I hook it still comes out a lil big. Anyway of possibly getting a video
Hi, Jennifer. I get a lot of requests for videos. I’m definitely going to have to look into it!
Be sure that you didn’t work into the ch 2. That would make it bigger than it should be.
I was having the same problem. I stopped the increasing after row 3 (55). The hat fits better, but it is really long. So now I’m thinking of taking out 2-3 rows (6,9,12). Hopefully that will work.
That could work for some who are finding this hat too big for them 🙂 Thanks for sharing your tip!
What kind of elastic did you use? My hat is big and I wonder if it could be because I started with a band big.
Hi, Robin, I used a thin ponytail elastic. It’s about the diameter of 25 chains.
Hi Lauren! I love this pattern! One question: how do I do the chain loop? I’m having difficulty finding a video/tutorial on it. Thanks!
Hi, Angela! Glad you like it. Ok… So hopefully I can clarify a little bit. You’re going to chain until you could lay the chains on top of the elastic and have it the same size, does that make sense? Then, after it could make a circle the same size, you’re going to slip stitch to join.
At this point, ch 2. Now, work around the hair tie AND the chain and follow the pattern.
I hope this helps!! 🙂
Thanks so much, Lauren! That helps a LOT! I can’t wait to get started 🙂
Wonderful! I’m so glad. Sometimes I feel like I’m about as clear as mud 😉
In the first round round wit her the 33 dc is that in the hair tie?
It is 🙂
about how much yarn is used for this pattern?
My finished hat weighs 2.1 oz.
So I am brand new to crochet….I am trying to do the double crochet around the elastic and I think I am missing something….should I single crochet around the elastic and then do the double crochet?! Sorry to seem slow!!
Oh you’re fine 🙂 Ok… what you’re going to do is Sl st around the elastic. Then, chain 2. At that point, you’ll dc around the elastic. I need to have my husband video me doing this part. I might try to do that this afternoon!
At the end of Round 11 it says to cut yarn and weave ends, but in the picture it doesn’t look like you did that?
Can you help? I changed to color 1 colors for Round 12 but I think I’m supposed to continue with Color 2 until end of round 13.
Hi, Pamela! You’re right! I’ll make that change in the pattern. Thanks for finding that.
Your pattern is wonderful! The instructions are well written and easy to follow. Thank you for sharing! I think I’m most impressed by your patient help to those who are new to crochet and having problems with the written instructions. I think we as experienced crocheters forget how confusing things are when we start. May I suggest that if anyone is having problems with their hat growing larger is that they count every row to be sure they still have the correct number of stitches in each row (it is so easy to increase without realizing it). Again thank you.
Thanks, Joyce. I remember needing lots of help when I first started crocheting. I’m happy to be of what little help I can be to those who are just starting out.
Great advice, too. Definitely have to count stitches every round!
How long did this take you to make? Or anyone else who has tried it? I’m not the world’s fastest or most skilled crocheter and was curious to how long it took other people. I am excited to try this pattern though!
This hat took me about an hour to make 🙂
I like your pattern. However, I can not get a good clean print due to all the repetative adds. Is there a way to add a “Print Friendly” key? Thank you.
If you go to PrintFriendly.com, you’ll be able to see instructions for making ANY page into a pretty printable 🙂
In the update, how do you incorporate the chain loop into the pattern?
Thanks
Hi, Roberta. I think I’m going to make a video on this ASAP to answer some people’s questions 🙂 But, in the meantime, ch 25 and sl stitch in the first loop to make a circle. Then, ch 2. At this point, hold your hair elastic and the circle you just made together. Work your 33 dc from the first round around all of that 🙂 Hope this helps!
I tried to make a simple messy bun hat using all dbc but I have an ugly seam down the back. If I try this hat in one color will I still have a seam showing? I wish I could make a hat without messing it up someway. I always have knots on the first and last round and gaping seams.
Newbie here. I just want to make something pretty and perfect.
Hi, Angela. You will have a small seam, but the way I have you work in an extra dc each round and then slip stitch in the top of the dc rather than into a chain does seem to help that. If you want to email me, I can try to give you more specific help (maybe send me picture of the holes you’re talking about). lauren@daisycottagedesigns.net is my email address 🙂
Hello. I’ve tried this twice (up to third round) and I keep coming up a stitch short. I’ve counted everything twice and followed pattern exactly as stated. Any idea what I’m doing wrong? I’m not a beginner, but I’m not sure where I’m making a mistake. Please help.
Hi, Natalie! I sent you an email 🙂
im haven trouble with this patter i am loosing a stitch when it says 55 i have 54 not counting thechain 2 stitch
Whenever I have this problem, I just sneak an extra stitch into a round. You probably just missed one of the increase stitches on the round before… but, just being one stitch off isn’t worth ripping out a round… just sneak an extra stitch in 😉
My hat came out to big. Did swatch and counted at end of each row in project. 1st hat was 26″ in circumstance when finished. Next one I did I used size H needle. Counted each time this ended up being still to big 24″. What am I doing wrong. I am not using the CH 2 stitch. Was easy to do and enjoyed it till I had the finished project to big.
Hmm… I’m not sure, Nancy. The hat fits me well. Maybe I have a HUGE head?! Totally possible. I do wear the hat pointing towards the back of my head so that brings the brim up. Hope this helps. You could always try this size if you’re having problems.
Love your pattern. We dont have anyplace to buy yarn here but walmart..and of course they dont carry this yarn.
What colors would you use in redheart?
I’m not familiar with RedHeart colors :/ I’m so sorry.
Hi! Great pattern. Looks easy to do, going to start tonight. Here’s an odd question. Would you mind sharing how you did your hair in the pictures? I am envious of how smooth and perfect it looks.
Hi, Sabrina. I put it in a ponytail, slipped it through the hole, and then just twisted my hair into a bun. I pinned it with bobby pins to keep it in place. Nothing fancy at all 😉
I seem to be the only one with this question unless I missed it in he comments but I have just started working on this and I have done the 33 dc and sl st for round 1, now am I supposed to ch 2 here before I start round 2 or just do the dc without the ch 2?
Oops! Yes you do!! I added that in.
Hi. Cute pattern!! I am at row 13 and I’m using the same hook and Red Heart Super Saver yarn. Is it supposed to be loose fitting?
Mine is not loose fitting 🙂 But, I do wear it back on my head some so I’m not sure if that has an impact on fit.
I’m so happy right now. I can’t tell you how many messy bun hat patterns I’ve tried and ripped apart before I got half way done. BUT, I finally found one I was able to finish!! It’s not perfect but I finished….I FINISHED!!!! Thanks so much!!
Wendy, that’s awesome! I’m so excited for you!! So glad you enjoyed the pattern!
Thank you for such an easy to use pattern. As a beginner, the stitch count at the end of each row was extremely helpful! I’m on my second hat in as many days!
Leslie – I’m so glad you liked it! Even as an avid crocheter, I still like stitch counts!!
Thank you so much for sharing this pattern! It’s beautiful. I have a quick question. I am currently working on a hat and was wondering if you need to ch2 at the beginning of each dc row. I noticed that a few dc rows don’t say to start with a ch2.
Thanks in advance for your help.
There should be a ch 2 in each row (until you get to the sc rounds). I’ll have to go back and see which ones I accidentally forgot 😉
I’m just starting out, never chrochet before in my life! Do you have a video that I can follow? I’m really wanting to learn.
Hi, Krystal. I don’t at this time. I really liked the KnitWitch videos when I was first starting out, though!
I love it! I’ll need to go down on needle size as I have a pin head. ?
LOL! I can remember my mom referring to herself as a pin head.
Your instructions are great! Thank you for sharing! I have made several for daughters and granddaughters. And I love, love the flower pattern!
Thank you, Susan! I’m so glad you like it.
I would love for you to make a video of this process, I learn so much better watching someone and being able to follow along. Plus it’s beautiful and I just can tell for the life of me read crochet patterns, ugh I get lost 🙁
I’ve got to look into doing more videos 🙂 I get a lot of requests, but just have to find the time.
Help! I know this would be a fun hat to make if I could just get started. I cannot figure out how to slip stich around the hair ties.
Woot for figuring it out all on your own!
Yep 🙂
Ok, I am sorry to have bothered you but I have finally figured it out, and I am on a roll, Thanks so much for the pattern.
Yay!!! No problem at all. I was about to reply to all my comments and then saw this reply 🙂 So glad to hear it.
Quick question: do you have to turn after each row?
Thanks!
Nope! 🙂