Baby Boy Blanket Crochet Pattern – 10 Sizes!
Looking for a baby boy blanket crochet pattern? This project is a great choice. You can find the written pattern in the post below, or you can purchase the ad-free PDF in my Etsy shop.
Last week, my family and I took a trip to several National Parks in California. We live in Florida, so our travel days were long and I knew I wanted to have a project for the flights and layovers.
I started this blanket on our first flight, and I finished it on our layover in the Atlanta airport on our way home. It was the perfect project to take on a trip.
Some of our good friends are expecting a baby boy, so I decided to make a snuggly crochet baby blanket for that little one. I know this will be the perfect crochet gift.
Is there anything better than seeing newborns snuggled up in an adorable baby blanket?
About the Yarn
When I shared photos of this project to Instagram, I received many messages asking me about the yarn I used for this baby boy blanket.
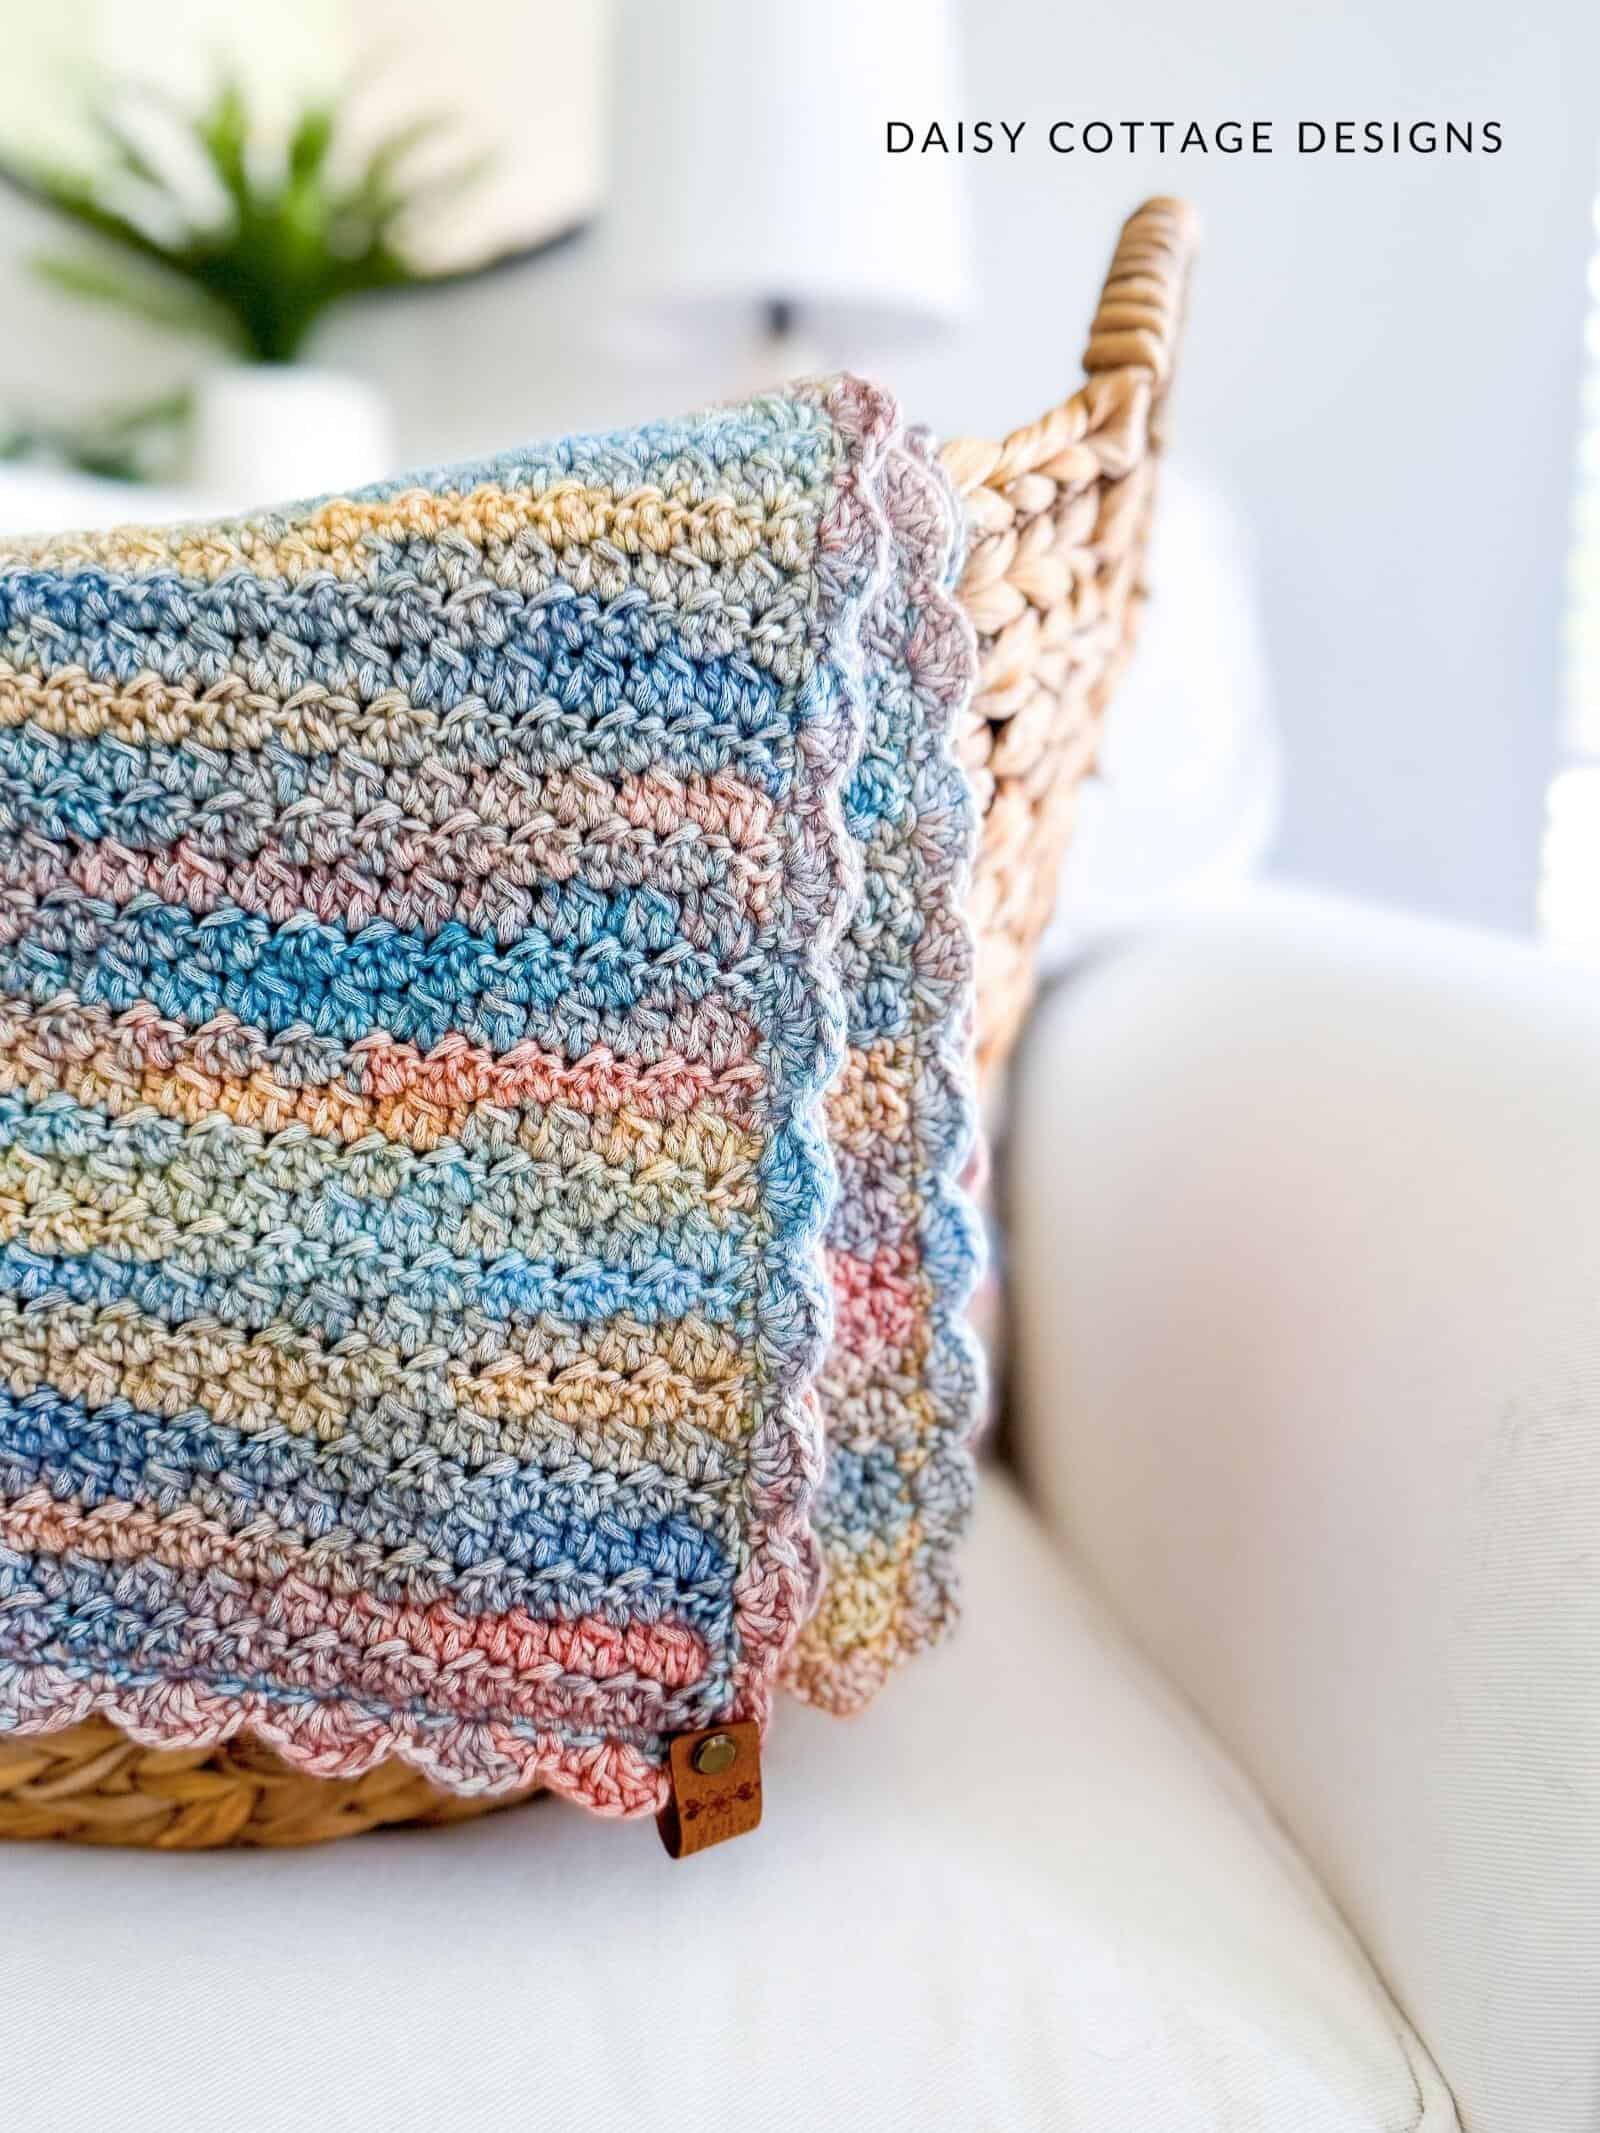
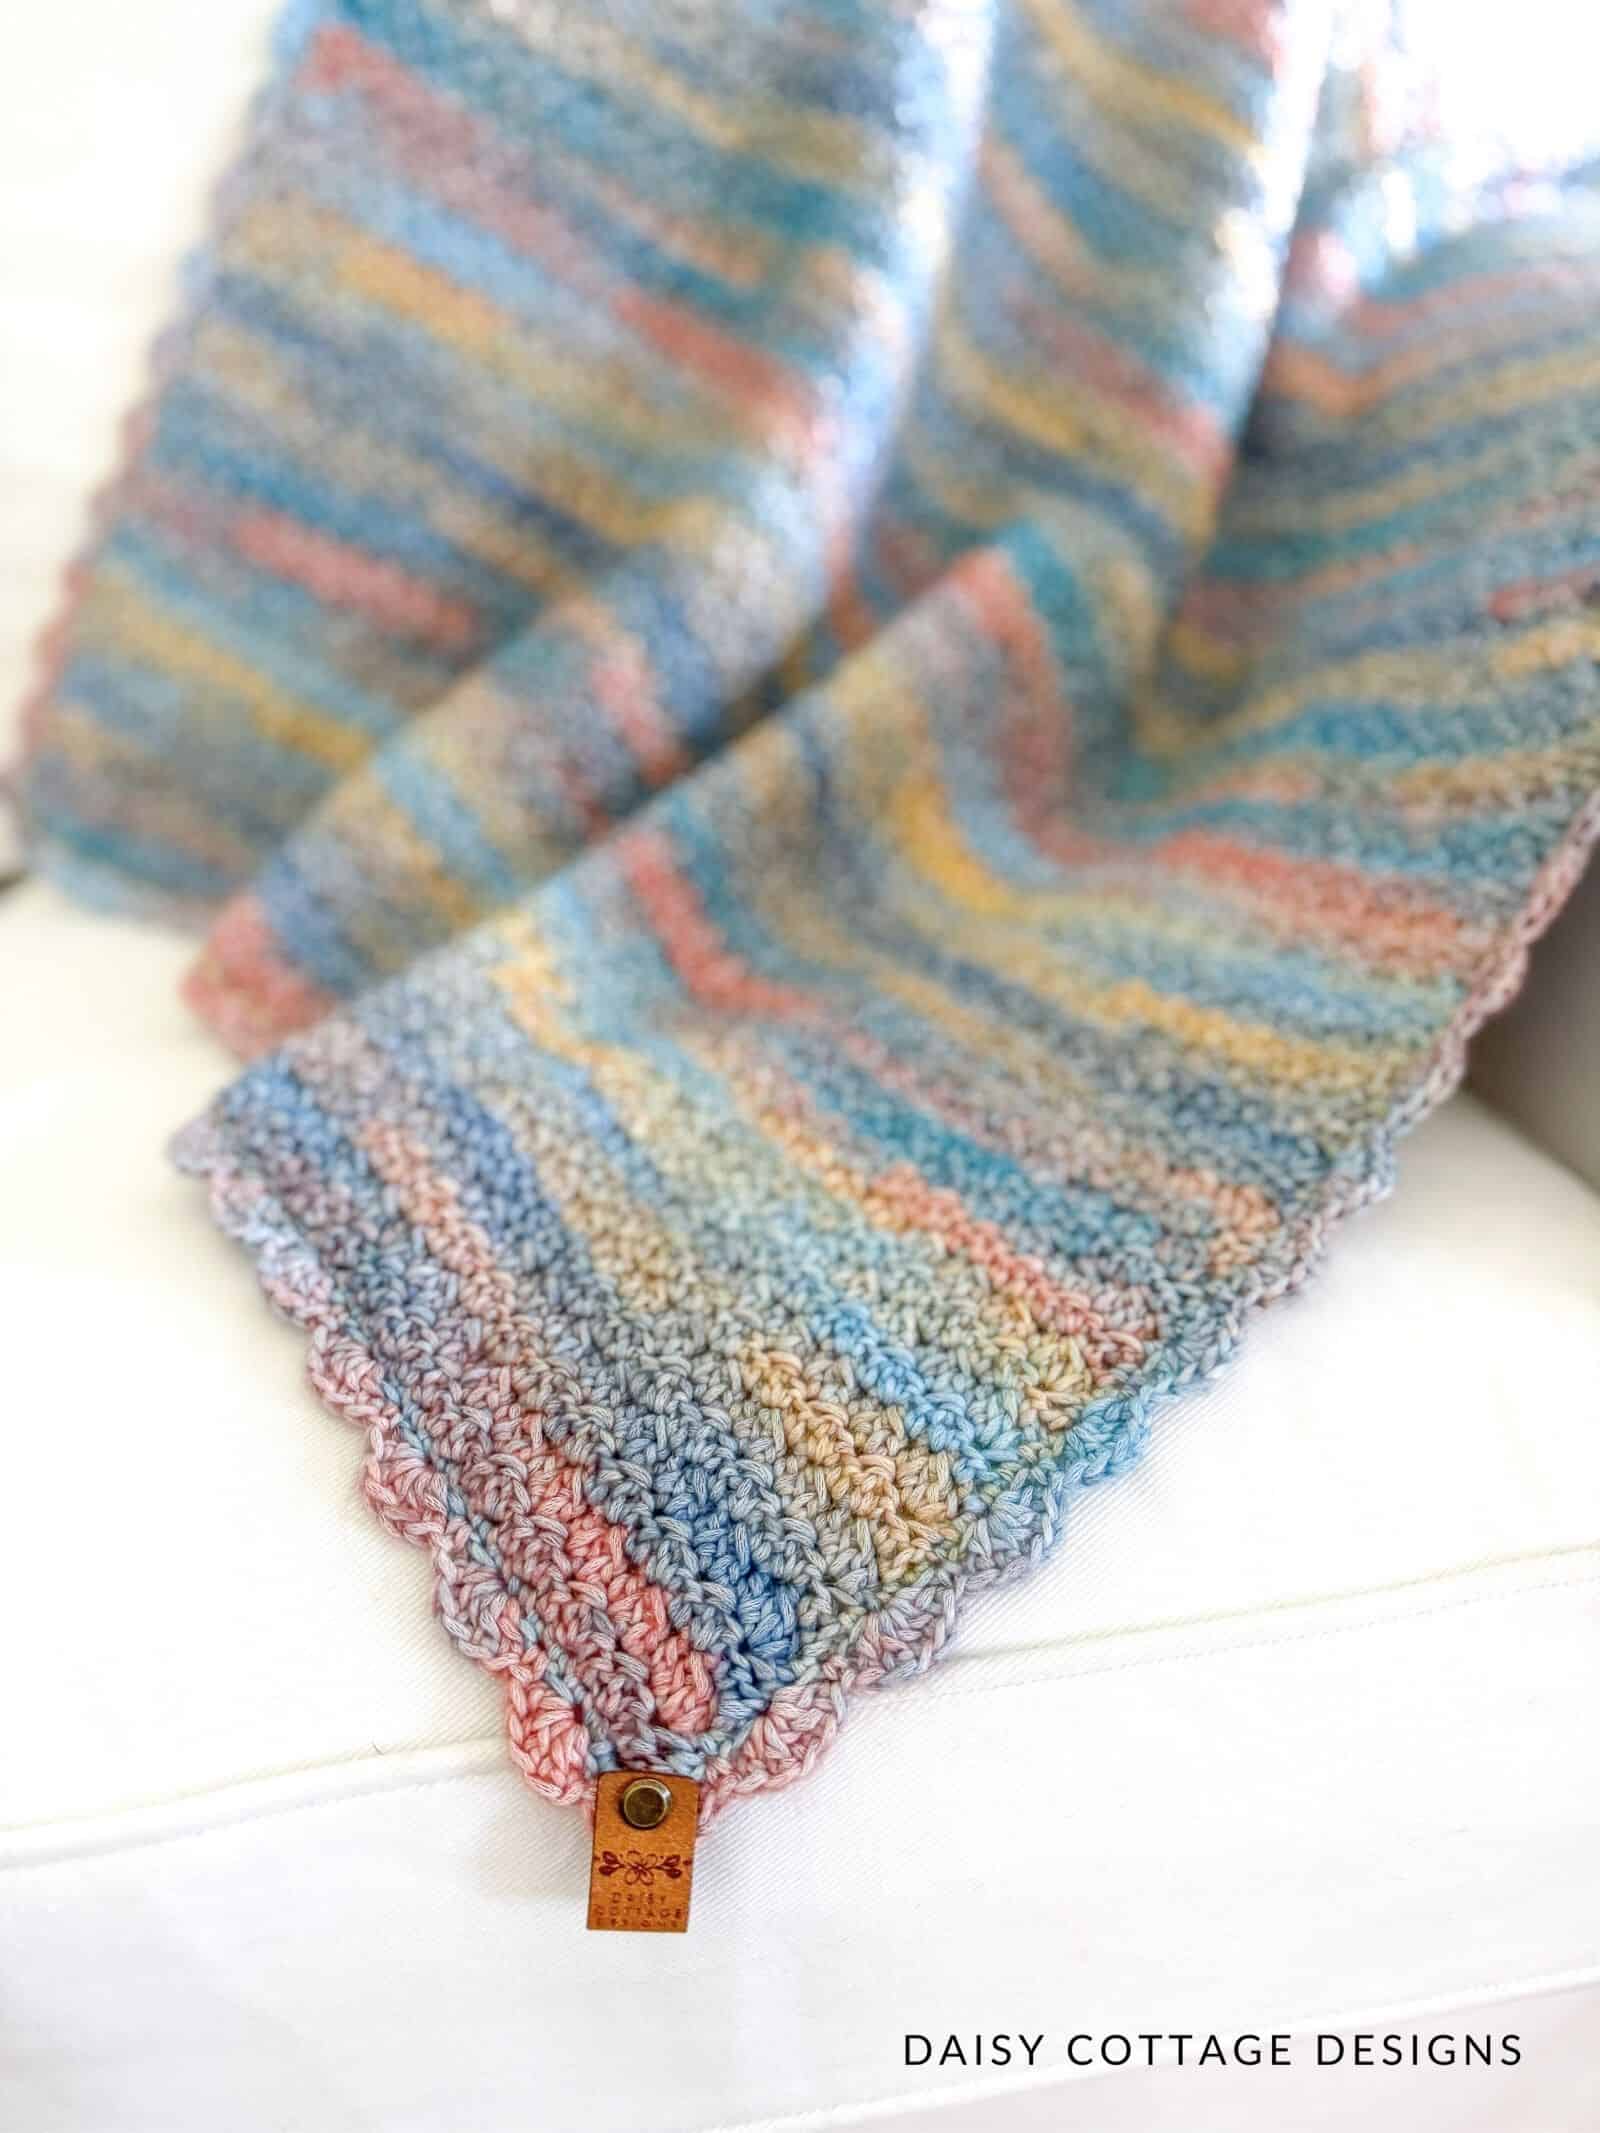
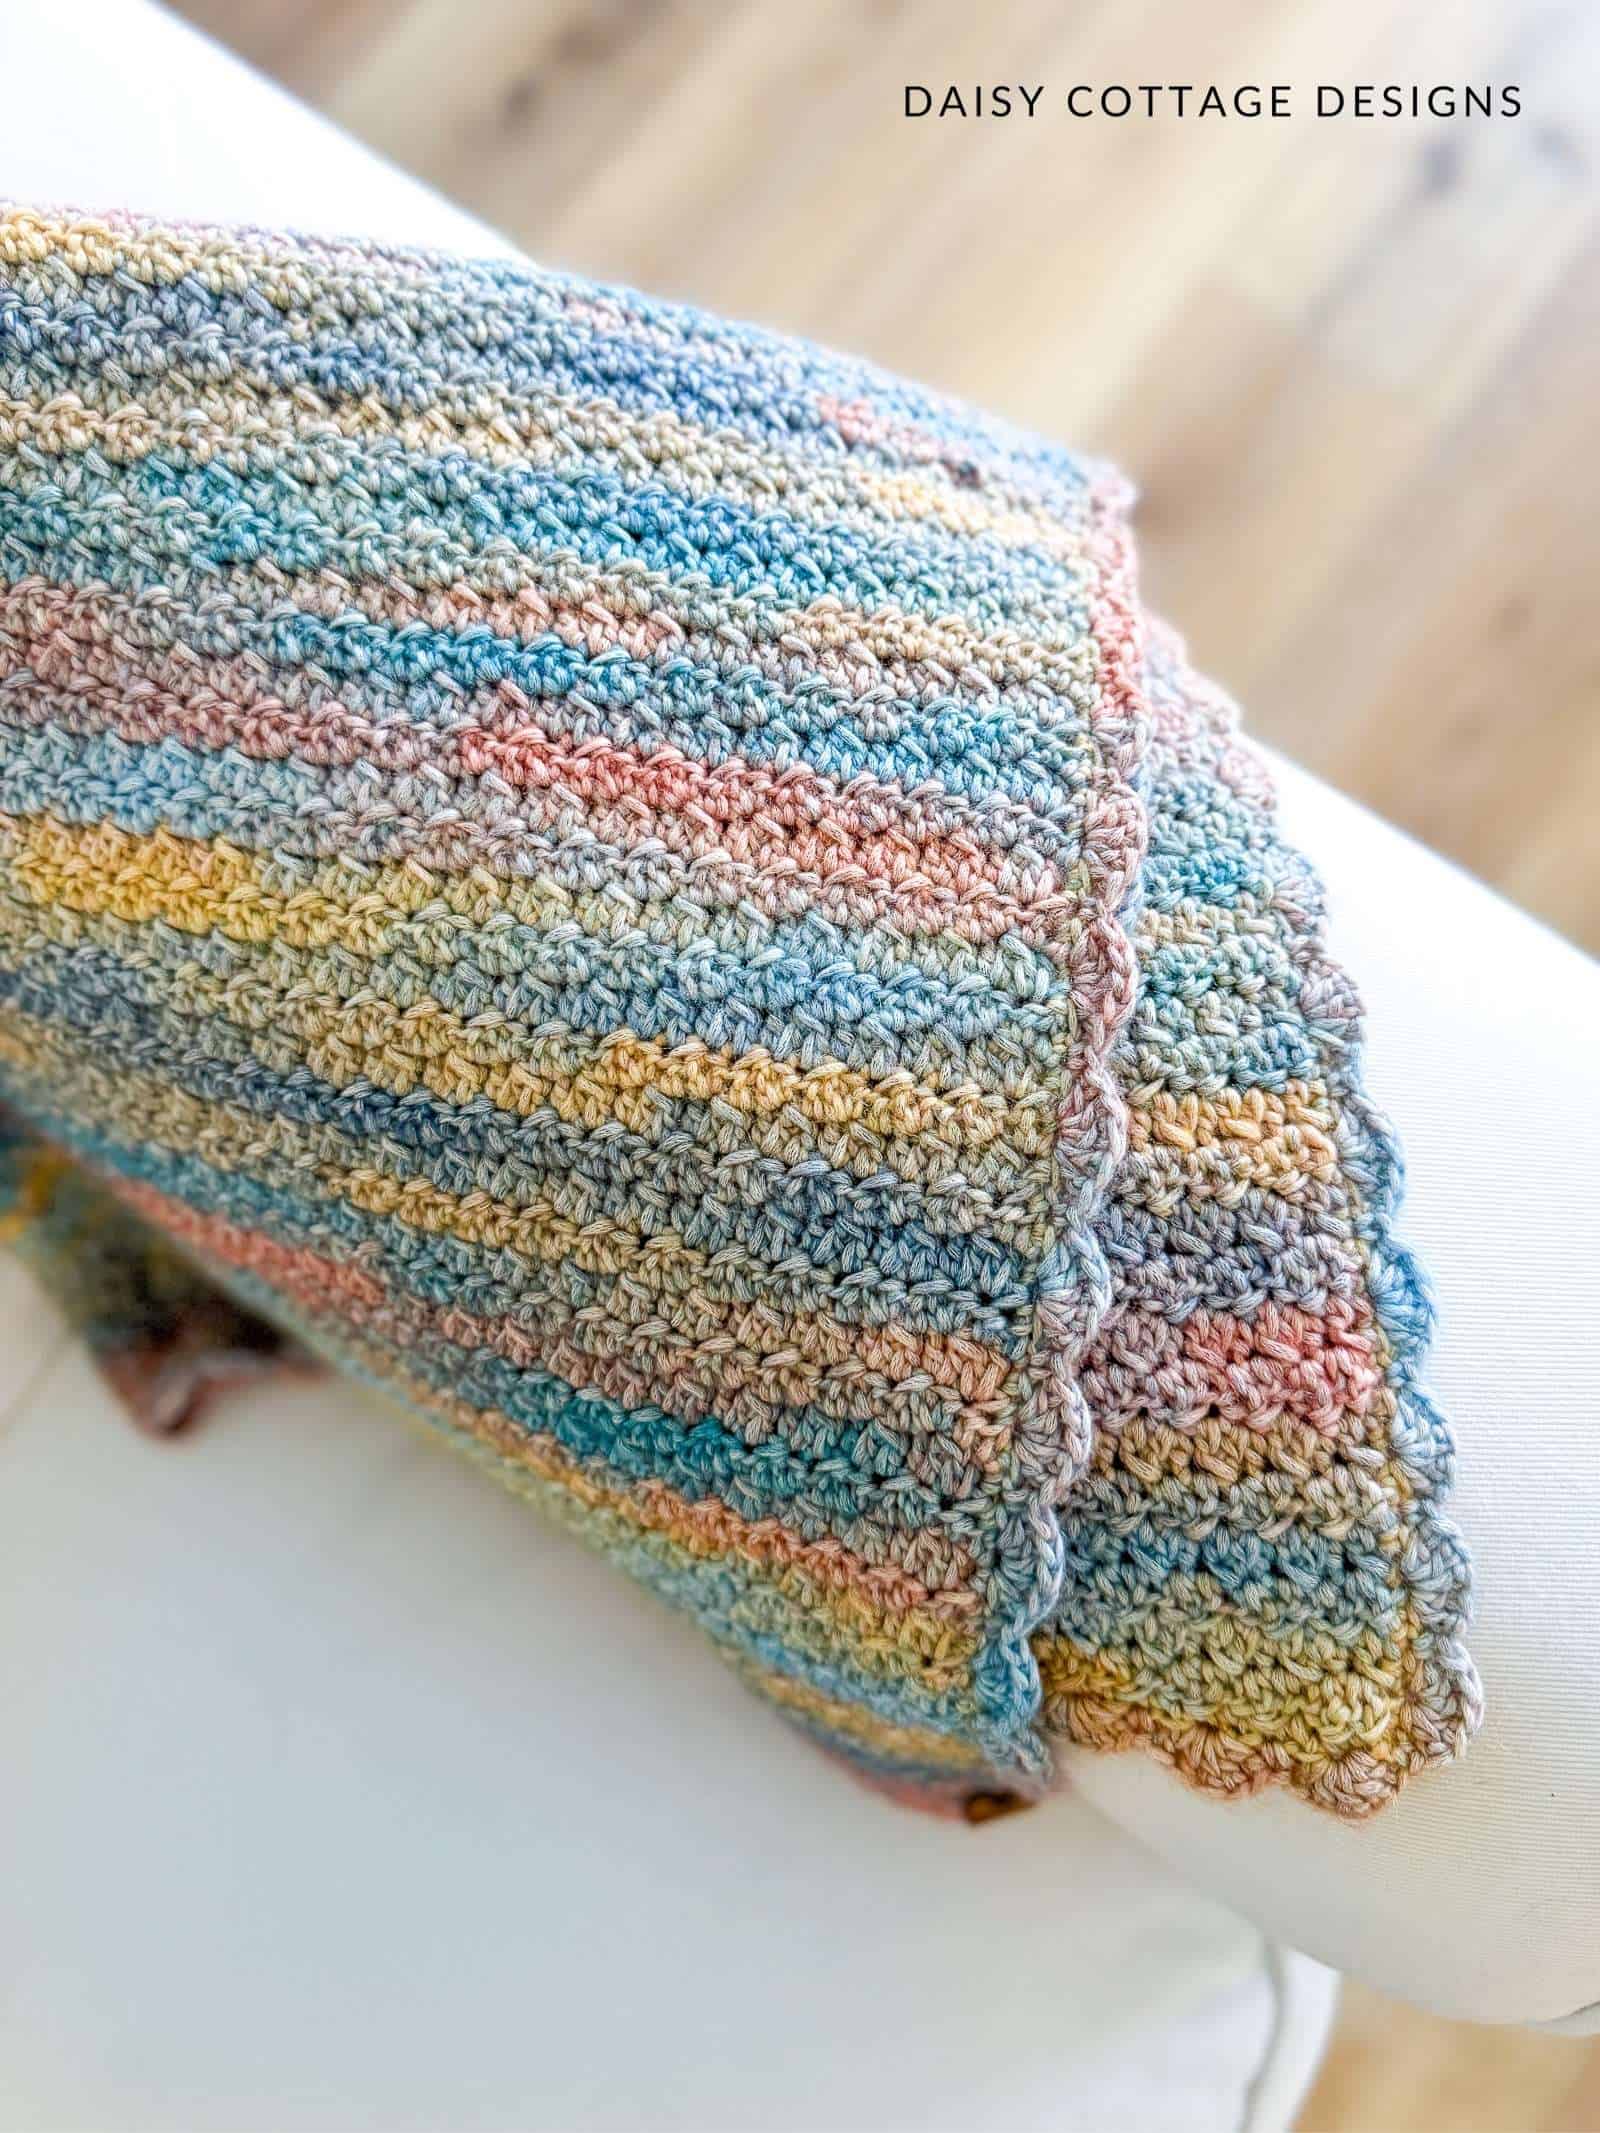
Variegated yarns are making a comeback lately, and I’m here for it! This variegated yarn from Wool Warehouse caught my eye. It’s Pebble Haze DK Prints in the shade Birling.
I love how this yarn incorporates some of the traditional little boy blues with shades of yellow and red. While I have tried to be accurate in portraying the color of this yarn, please be aware that the colors look a little brighter in these photos than in real life. I think this is due to the sunny room and the white background.
This cotton blend yarn is one of my favorites to work with. It has great drape, and the stitch definition is excellent.
About the Stitches
While I don’t think that the stitch combination I used has a specific name, I absolutely love the texture.
It’s a combination of double crochet 2 together (dc2tog) and half double crochet stitches. While that may sound a little bit complicated, I promise it’s not!
Once you get the hang of it, this stitch has a great rhythm and works up very quickly.
Still nervous? Don’t worry! The video tutorial will walk you through the stitch step-by-step.
For the border, I added a scalloped edge using the same yarn. I think it adds just the right amount of charm to the project.
Yarn Substitutions
Switching out the yarn is definitely possible on this project. Feel free to use your favorite dk weight (weight 3) yarn.
For the size chart to be accurate, you’ll need to stick to a DK (weight 3) yarn. However, making this in a worsted weight yarn will work just fine. Keep in mind that your blanket will be bigger and need a little bit more yarn if you’re using worsted weight rather than a DK.
While you could use a bulky yarn for this stitch, I do think you’d lose the stitch definition.
If you do decide to use a different yarn, I recommend going up one hook size from whatever is recommended on the yarn label.
How difficult is this pattern?
I’d label this pattern as easy.
While this crochet blanket pattern uses stitches that are a little more involved than the basic stitches, it’s still an easy baby blanket crochet pattern. I’m sure that beginners will be able to successfully work this pattern.
The video tutorial makes this pattern easy to follow, and will help you clarify any parts you might find tricky. If you still have questions after you’ve watched the video, I’d be happy to help answer them!
Looking for a blanket that’s even easier? Check out this easy baby blanket pattern. Want to try something a little more complicated? Consider the heirloom blanket pattern.
The Painted Skies Baby Blanket Pattern
Prefer the pattern without ads? You can purchase it on Etsy.
Materials:
- I/9 (5.50 mm) Crochet Hook
- 3 Skeins Yarnsmiths Pebble Haze DK in the shade Birling
- If you’re using a different yarn, you’ll need approximately 1000 yards of DK/Weight 3 yarn
- Tapestry Needle & Scissors for weaving ends
Pattern Notes:
- This pattern is written US terms.
- Skill Level: Easy
- As written, this blanket measures 28″ x 30″.
- Instructions for changing the size and a chart including 9 other sizes (lovey to king) are given at the end of the pattern.
- The turning chain does not count as a stitch in this pattern.
- You’re welcome to sell projects made using this pattern. I simply ask that you use your own photos 🙂
- You can find a video tutorial for this pattern here.
Abbreviations
- ch – chain
- sc – single crochet
- hdc – half double crochet
- dc – double crochet
- dc2tog – double crochet two together
- sl st – slip stitch
- sk – skip
- ** – repeat what’s between the stars
Special Stitches:
- Here are step-by-step instructions for the double crochet 2 together (dc2tog):
- Step 1: yarn over, insert your hook into the stitch and pull up a loop.
- Step 2: Yarn over and pull through the first 2 loops on your hook.
- Step 3: Yarn over, insert your hook into the next stitch and pull up a loop.
- Step 4: Yarn over and pull through the first 2 loops on your hook.
- Step 5: Yarn over, pull through the remaining 3 loops.
Instructions
Ch 97.
Row 1: dc in the second chain from the hook. dc2tog starting in the same chain and finishing in the next. Work a hdc into the ch where you completed the dc2tog. *dc2tog over the next two chains, hdc in the ch where you completed the dc2tog* across until 2 chains remain. End with a dc2tog over the last 2 chains. Ch 1, turn.
Row 2: dc in the first stitch. dc2tog starting in the same stitch and finishing in the next. work a hdc into the stitch where you completed the dc2tog. *dc2tog over the next 2 stitches, hdc into the stitch where you completed the dc2tog* across until 2 stitches remain. End with a dc2tog over the last 2 chains. Ch 1, turn.
Repeat row 2 for a total of 75 rows.
Border Pattern
Round 1: single crochet evenly around the entire blanket, working 3 sc into each corner. Sl st to the top of the first st to join.
Round 2: Ch 1. sc in the same stitch. Skip the next stitch, 5 dc into the stitch after that. *Skip one st, sc into the next st. Skip one st, 5 dc into the next st* around. You don’t have to worry about doing anything specific in the corner stitches. When you get back to the first corner, work two additional dc into the first corner st. Sl st to the firs stitch to join.
Note: You can find a video tutorial for a shell stitch border here. I’m starting on a sc rather than a shell stitch since I did not change colors before my shell stitch round, but you can get the general idea!
Adjusting the Size of this Blanket
Changing the size of this beautiful blanket is easy. Simply make your foundation chain until you reach your desired width making sure you have an odd number of chains.
To reach the length you want, simply repeat row 2 until you like the size of your project.
Note: Your stitch count at the end of each row should be one fewer than the starting chain. For example, if you’re making the Crib size, each row should have 140 stitches.
The chart below includes 10 common sizes.

Share Your Work!
If you make this blanket, snap a photo and tag me on social media! I love seeing what you’ve been making. You can find me on Instagram and Facebook.