Messy Bun Hat Crochet Pattern
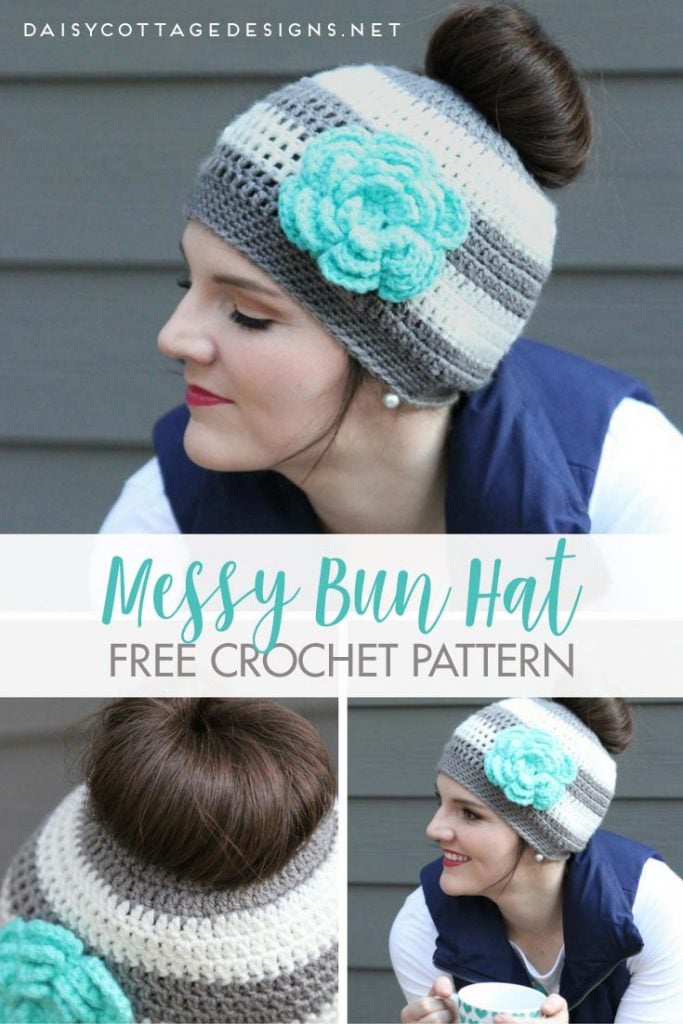
Last week, a “new” thing in crochet went viral. Although it wasn’t really new at all, the messy bun hat is the hottest thing in crochet at the moment. Also called the ponytail hat (among other things), it’s a great way to keep your head warm without having your hair stuck up under your hat.
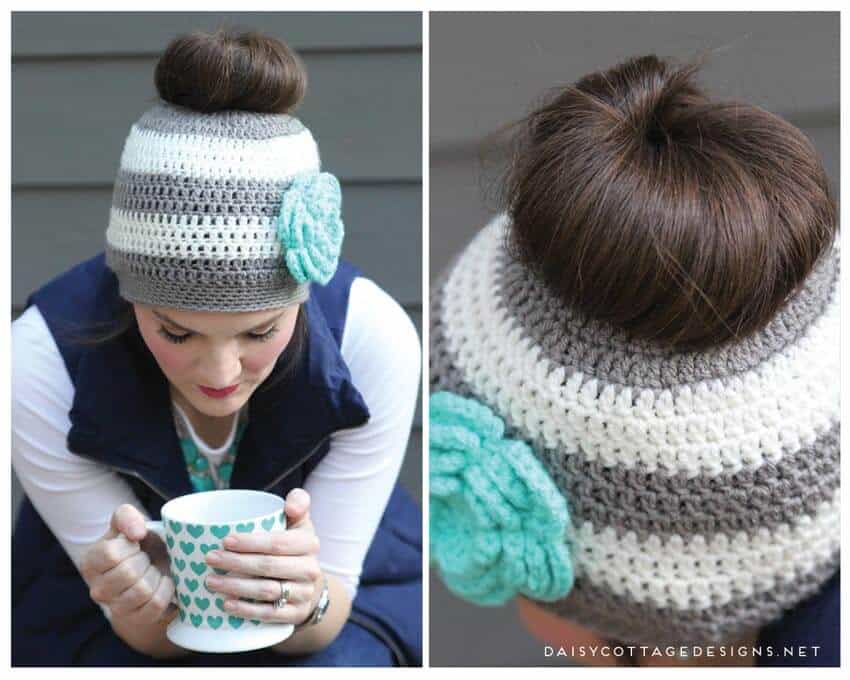
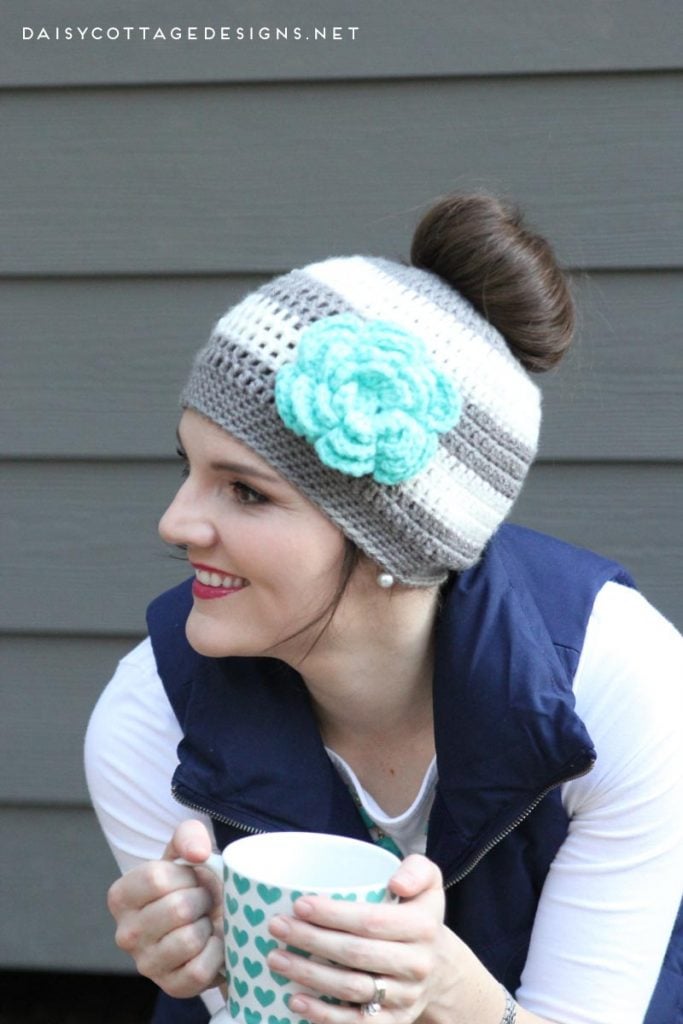
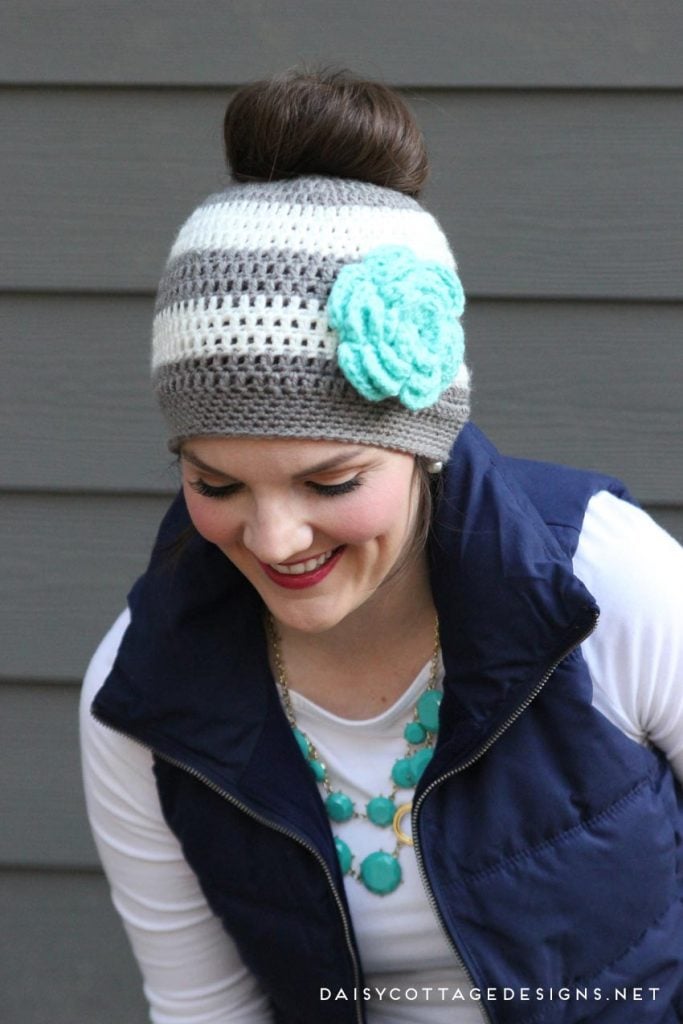
I had to get in on some of the fun, so I created this striped ponytail hat crochet pattern. I love that it’s worked in the round and from the top like a traditional crochet hat and that you begin by working around a hair elastic so it can easily fit around your bun and keep its shape.
When I made this messy bun hat, I used stripes, of course. As I may have mentioned a time or 10, I love stripes. If you’re looking for more adorable striped crochet patterns, All Free Crochet is a great resource.
Other Messy Bun Free Crochet Patterns:
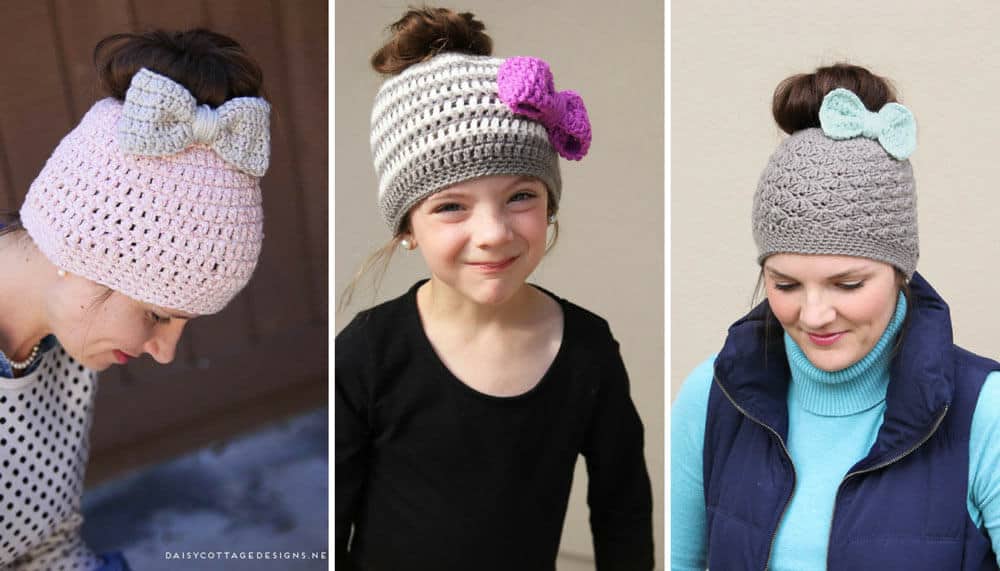
- Kids Messy Bun Crochet Hat Pattern
- Chunky Messy Bun Crochet Beanie Pattern
- Shell Stitch Messy Bun Crochet Hat Pattern
Can’t crochet this hat right now?
- Pin it for later!
- Find more free crochet patterns!
- Click here to queue or favorite on Ravelry
Messy Bun Hat Crochet Pattern: For Women & Girls
Want to purchase an ad-free PDF of this hat? The adult and child size are included along with the bow and flower pattern! Click here to purchase those patterns!
Materials:
- Worsted Weight yarn in two colors (if you want a stripe pattern… if not, just one adorable color)
- I Crochet Hook (I used my I hook from this set)
- Tapestry needle
- Double Knit Yarn for flower
- Large flower crochet pattern
To begin this ponytail hat crochet pattern, you’ll be working into a normal ponytail elastic. I recommend using several of the thin elastics rather than one fat one. That way, if one of them snaps (I have thick hair so I get elastics snapping regularly), your hat will still be perfectly fine and good to go.
Updated Note (12/18/16): Lisa from a FB group I’m in suggested creating a chain loop the same size as the ponytail elastic. That way, if you’re hair tie snaps, your work will still be intact! Fantastic idea.
Important Notes:
- By request, I have created a video tutorial for beginning this hat. Find that video here.
- At the end of each round, make sure you’re working into the first REAL double crochet and not the top of the ch 2. You work an extra stitch into the beginning of each round so you don’t have to work into the sl st.
For those whose hat is too big:
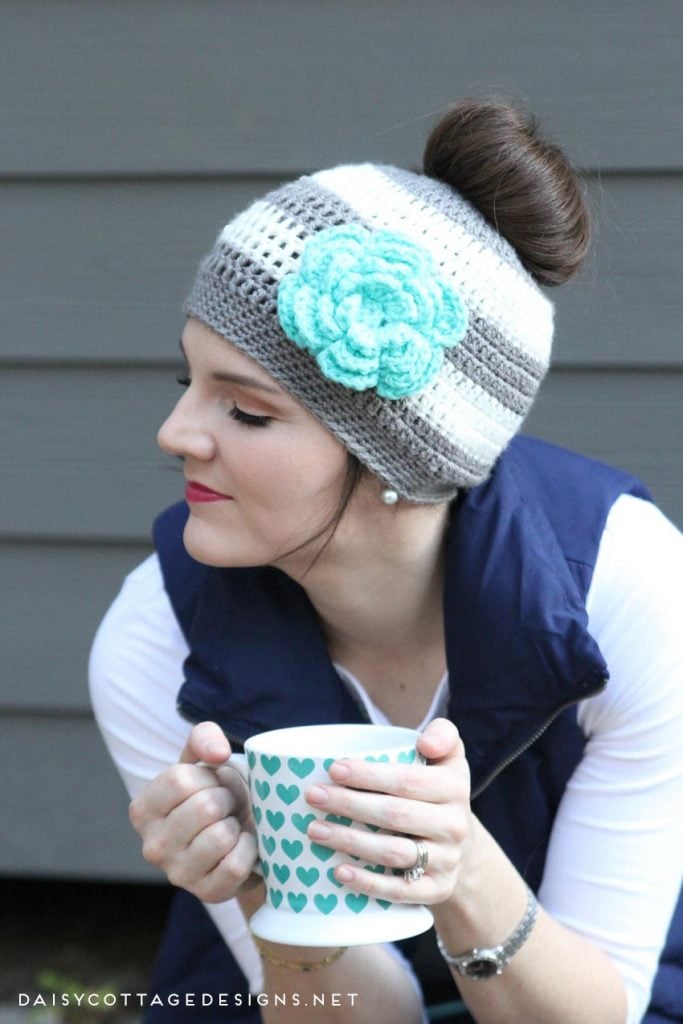
This hat is not meant to be worn with a bun that’s right on top of the head. If you want to wear the hat that way, you’ll definitely have to leave off a few rows. As you can tell in the picture below, my bun is more in on the back of my head (still towards the top). So, my hat is not pulled straight down on my head, but is angled towards the back. I have counted and recounted, made and remade this hat to be sure the stitch counts are correct.
If you have a tendency to crochet loosely, I definitely recommend going down a hook size or two.
If you’re making a hat for a young teenager or an adult with a smaller head, you could also use the kids hat pattern as it will be just one size smaller than this hat.
Gauge Swatch
(ch 2 DOES count as your first stitch in the swatch):
ch 11.
Row 1: dc in the third chain from hook and in each stitch across. Ch 2, turn. (10)
Row 2-6: dc in the second stitch and in each stitch across. (10 – including the ch 2)
This swatch should approximately measure 3” x 3”.
Messy Bun Hat Pattern
Round 1: Sl st around the ponytail elastics. Ch 2. Work 33 dc around/into (not sure which terminology makes sense). Sl st to the top of the first dc (NOT into the chain 2). Ch 2. (33) (If you want to see a video tutorial of how to do this, you can find that here.)
Round 2: 1 dc into the same stitch and the next stitch, 2 dc into the next stitch. *1 dc into the next 2 stitches, 2 dc into the next stitch* around. Sl st to the top of the first dc. Ch 2. (44)
Round 3: 1 dc into the same stitch and the next 2 stitches, 2 dc into the next stitch. *1 dc into the next 3 stitches, 2 dc into the next stitch* around. Sl st to the top of the first dc. Ch 2. (55)
Round 4: 1 dc into the same stitch and the next 3 stitches, 2 dc into the next stitch. *1 dc into the next 4 stitches, 2 dc into the next stitch* around. Sl st to the top of the first dc. Cut yarn and weave ends. (66)
Round 5: Join second color yarn using your preferred method. Ch 2, dc into each stitch. Sl st to the top of the first dc. Ch 2. (66)
Round 6: dc in each stitch. Sl st to the top of the first dc. Ch 2. (66)
Round 7: dc into each stitch. Sl st to the top of the first dc. Cut yarn and weave ends. (66)
Round 8: Join first color yarn using your preferred method. Ch 2, dc in each stitch. Sl st to the top of the first dc. Ch 2. (66)
Round 9: dc into each stitch. Sl st to the top of the first dc. (66)
Round 10: dc into each stitch. Sl st to the top of the first dc. Cut yarn and weave ends. (66).
Round 11: Join second color yarn using your preferred method. Ch 2, dc into each stitch. Sl st to the top of the first dc. Ch 2. (66).
Round 12: dc into each stitch. Sl st to the top of the first dc. ch 2 (66)
Round 13: dc into each stitch. Sl st to the top of the first dc. Cut yarn and weave ends. (66)
Round 14: Join first color yarn using your preferred method. Ch 2, dc into each stitch. Sl st to the top of the first dc. Ch 2. (66)
Round 15: dc into each stitch. Sl st to the top of the first dc. Ch 1.
Round 16-20: sc into each stitch. Sl st to the top of the first sc. Ch 1. (66)
Round 21: sc into each stitch around. Sl st to the top of the first stitch. Cut yarn and weave ends. (If you prefer to use the invisible finish method, omit slip stitch to the top of the first sc.) (66)
That’s it! You’re finished with your ponytail hat crochet pattern (or messy bun hat, whichever you want to call it). Keep reading for instructions on the flower.
To make the adorable flower embellishment for your messy bun hat, I used this large flower crochet pattern. I made it using two strands of double knit yarn and did an extra round to make it bigger. I also think it would be adorable to use a HUGE bow on the side. Use this large bow crochet pattern (find the bow pattern in the middle of the post… it comes after the headband). This bow pattern is also adorable!
Want to make this for a younger girl? Find the free kid’s ponytail hat pattern here.
A very special thank you to my friends Merissa & Nicole for helping me with my photoshoot for this ponytail hat crochet pattern. We had a great time getting dolled up and doing the styling for this shoot. I’m not usually very confident in front of the camera, and would rather not model my stuff, but they made me feel more comfortable than usual. I’d love it if you’d stop by and say hello to them!


Hi Lauren! Did you go down a hook size for your SC band? I like how it looks a little tighter at the bottom. Thanks for the pattern!
I don’t 🙂 I just crochet a little more tightly on purpose.
Thank you so much for this free pattern; so many people are so greedy in this old world that it is so refreshing to find kind, sharing people like you. I am 79 and have been crocheting all my life. I have a lot of grand and great granddaughters to crochet for, and have made two of your patterns. Thank you friend…..
Aw… thanks for your sweet words, Geneva!! I’m so glad that you like the pattern!
I just finished this hat and it is larger than it is supposed to be. What did I do wrong and can I fix it? I LOVE how it turned out it is just to big to wear lol
Hi, Kellie. Thanks for your message. I have counted and recounted and made and remade this hat to check the numbers. So, for the way I crochet, the pattern as written fits me great (maybe I have a huge head and don’t know it?!?!). But, I will say this, I don’t wear the hat straight down on my head. When I do that, it covers my eyes 🙂 I actually put my bun towards the back of my head. When worn like that, it should pull the front up to just the right spot. Hope this helps!
TY for such a quick reply! I am not sure what is going on. The only thing I can figure out is that I am using a different brand of hooks and yarn. Love the pattern though 😀
Try one hook smaller.
I can’t wait to make this, what kind of yarn did you use for yours?
Thanks!
I used Hobby Lobby I Love This Yarn for this hat 🙂
If the hat is too big , try remaking and going down a hook size or two. Did you swatch and check your guage? Ithe could also be the way you crochet. Some people crochet much tighter or looser than others.
Thanks, Rhonda! 🙂 Great tips.
This was my very first crochet project and I just finished! Took me around 8 hours to do it (I have a toddler too, started during nap time, and didn’t do the flower). Just wanted to say thanks!!
Great job, Danielle!!! 🙂
If you do not want to use an elastic and you just chain 33 and double as the first round?
I wouldn’t! I would chain and make a loop about the same size as an elastic and then work around that 🙂
It works perfect to NOT use a an elastic. Just put your hair up as usual then pull thrugh the hole. leave in ponytail or finish unto a bun
Great to know! 🙂
I used a H hook and it fits great . Question to chain loop how many chans needed? Love the hat.
I did 25 🙂
Hello! Im a begginer in crochet and would like to know what mean SL and ST thank you!! Thats a precious beanie❤️
Sl st means slip stitch 🙂
What size hook did you use?
I used an I hook 🙂
I made the hat and it turned out great. I used Red Heart Super Saver yarn with a double strand and size I hook.
Thanks for the great pattern. My daughter and daughter in law loved the hat.
I’m so glad to hear this, Debbie!!
Are you supposed to have an extra stitch at the end of a round before you sl into the first double crochet?
You shouldn’t have any extra stitches at the end.
Any suggestions on how to sew on the flower? Thanks so much!
I just leave a long tail on my flower and use that to stitch it on the hat 🙂
what’s the difference between worsted yarn and other
Worsted refers to how think a yarn is 🙂 Worsted is pretty normal, chunky is thicker. Double knit (DK) is thinner. Hope this helps. On a ball of yarn, worsted is usually referred to as a 4, I believe.
Thanks so much for sharing this pattern! Excited to give it a try – love the flower too!
Thanks so much, Brenda!
Is there supposed to be an extra stitch at the end of the round before you join into the first double crochet?
The extra stitch is worked in at the beginning so no extra stitch is needed at the end.
Hi Lauren, when starting each additional round do you reverse or just continue on ?
Just keep going! 🙂
Hi hers there! I’ve made the hat and the flower and all turned out beautifully! I’d like to attach the flower to a clip and was wondering how you attached yours??
I usually use hot glue 🙂 But, with this hat, I sewed it on.
love love love this hat…. I changed a bit to fit my head & my little girls but we love it
Yay! So glad, Tia!
If I want to make this hat without the hole in the top, how would I adjust the pattern? I love it! Thanks!
I just replied to your email 🙂
Your pattern instructed us to do 33 dc’s around the elastic band and it continued to increase the dc’s with each round until there was a total of 66 dc’s by round 4. I used a Hobby Lobby variegated yarn and an H hook. My gauge swatch was accurate but the finished hat was really big.
I made this hat for my adult daughter who is a marathon runner in NYC. I felt it would be good for her to wear while running as it gave her a way to keep her long ponytail up off her neck but still have a hat on. I was disappointed with the fit but she liked it anyway. It was more like a slouch hat on her.
Thank you for the pattern. I make beanies for the homeless and now I do them with the 66 dc’s as I feel this is a better fit for a man’s head.
You might want to use the children’s hat size! It’s definitely a little bit smaller, but would fit a woman if this size is fitting a man. I’m beginning to think I have a big head 😉
If your head is big, mine is bigger. I had to modify the pattern to make it bigger to fit my head more comfortably. 🙂
Whew. This makes me feel better 😉
Can’t wait to make my first messy bun hat!!
I know I have a small head and so I kept checking size as I made it. The 66 dc fit my head fine, but by the second change of the second color it was to my forhead, this may also be because of where I place my bun. Instead I modified the three rows of dc in second color then 2 dc in first color and 4 sc rows with 1 row dc of the second second color row then finished with 4 tight sc rows. Love the way it looks and can’t wait to show it off. Thank you so much for the pattern.
It definitely will make a difference depending on where the bun sits. 🙂