The Raspberry Lattice Blanket Crochet Pattern
This striped crochet pattern is perfect for crocheters at any skill level. Easy-to-follow directions and simple stitches make this a fantastic choice for anyone! The pattern is available in full in this post, or you can purchase a copy of the ad-free PDF on Etsy. You can also pin it so you can find it again later.
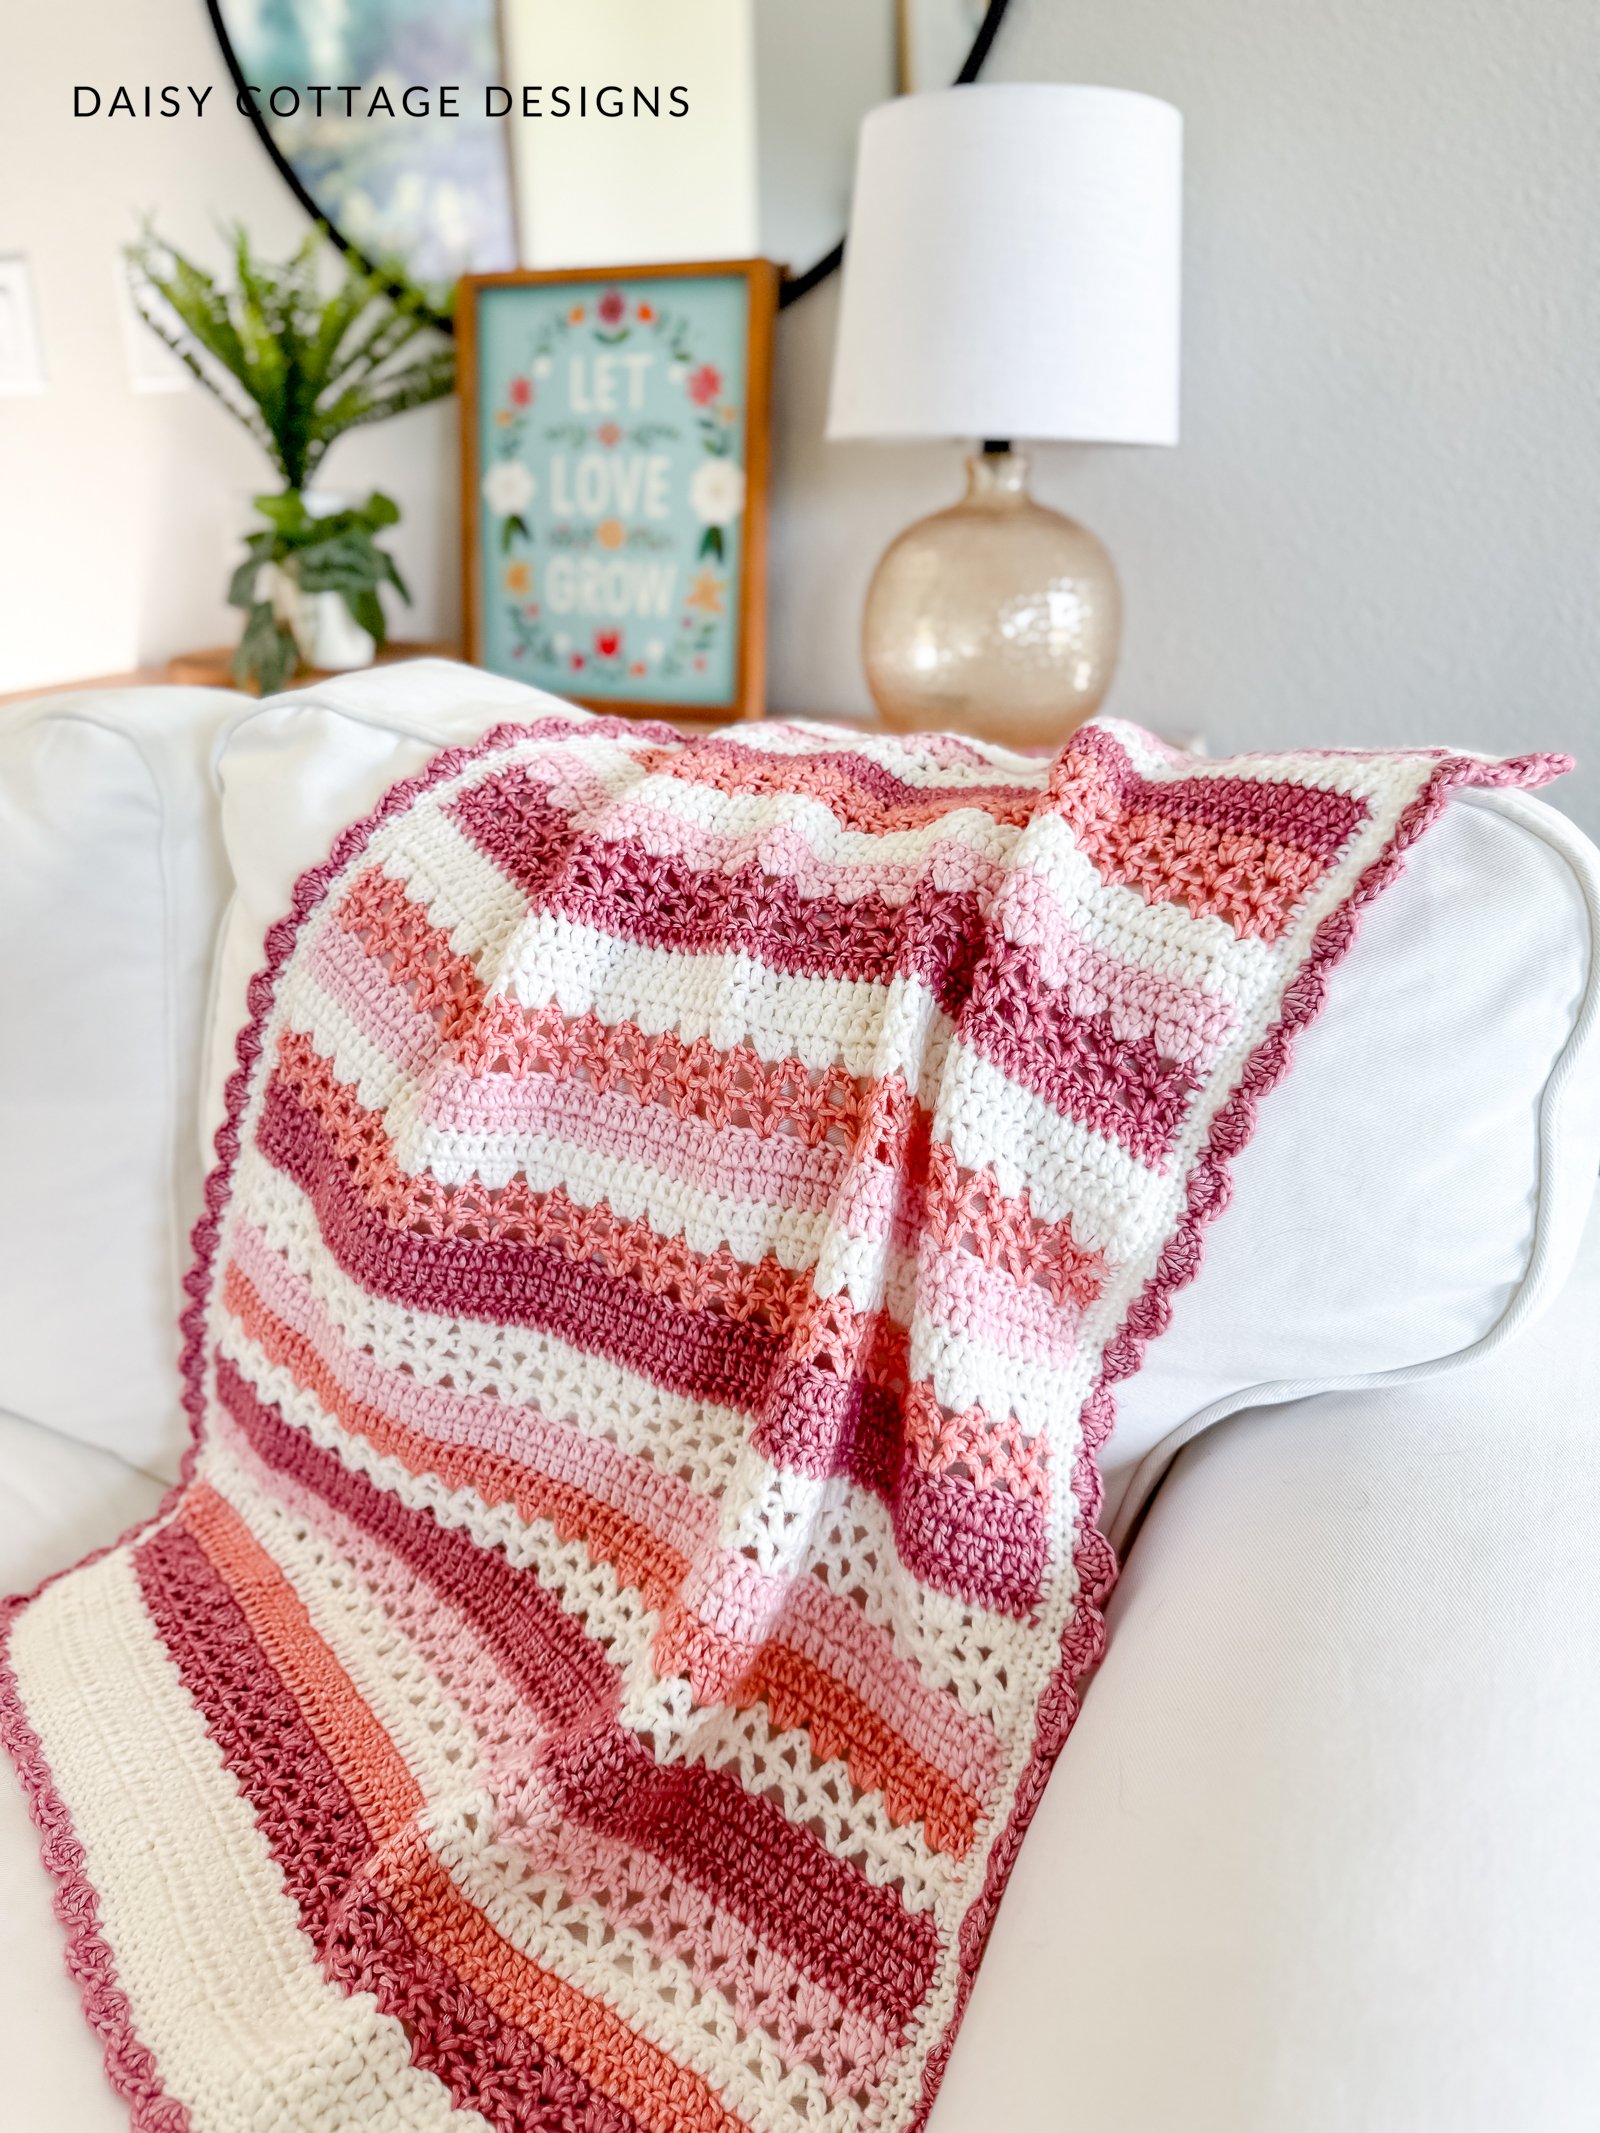
This striped crochet blanket was so fun for me to make. I loved everything about the process – from picking the yarn colors to adding the finishing touches and everything between.
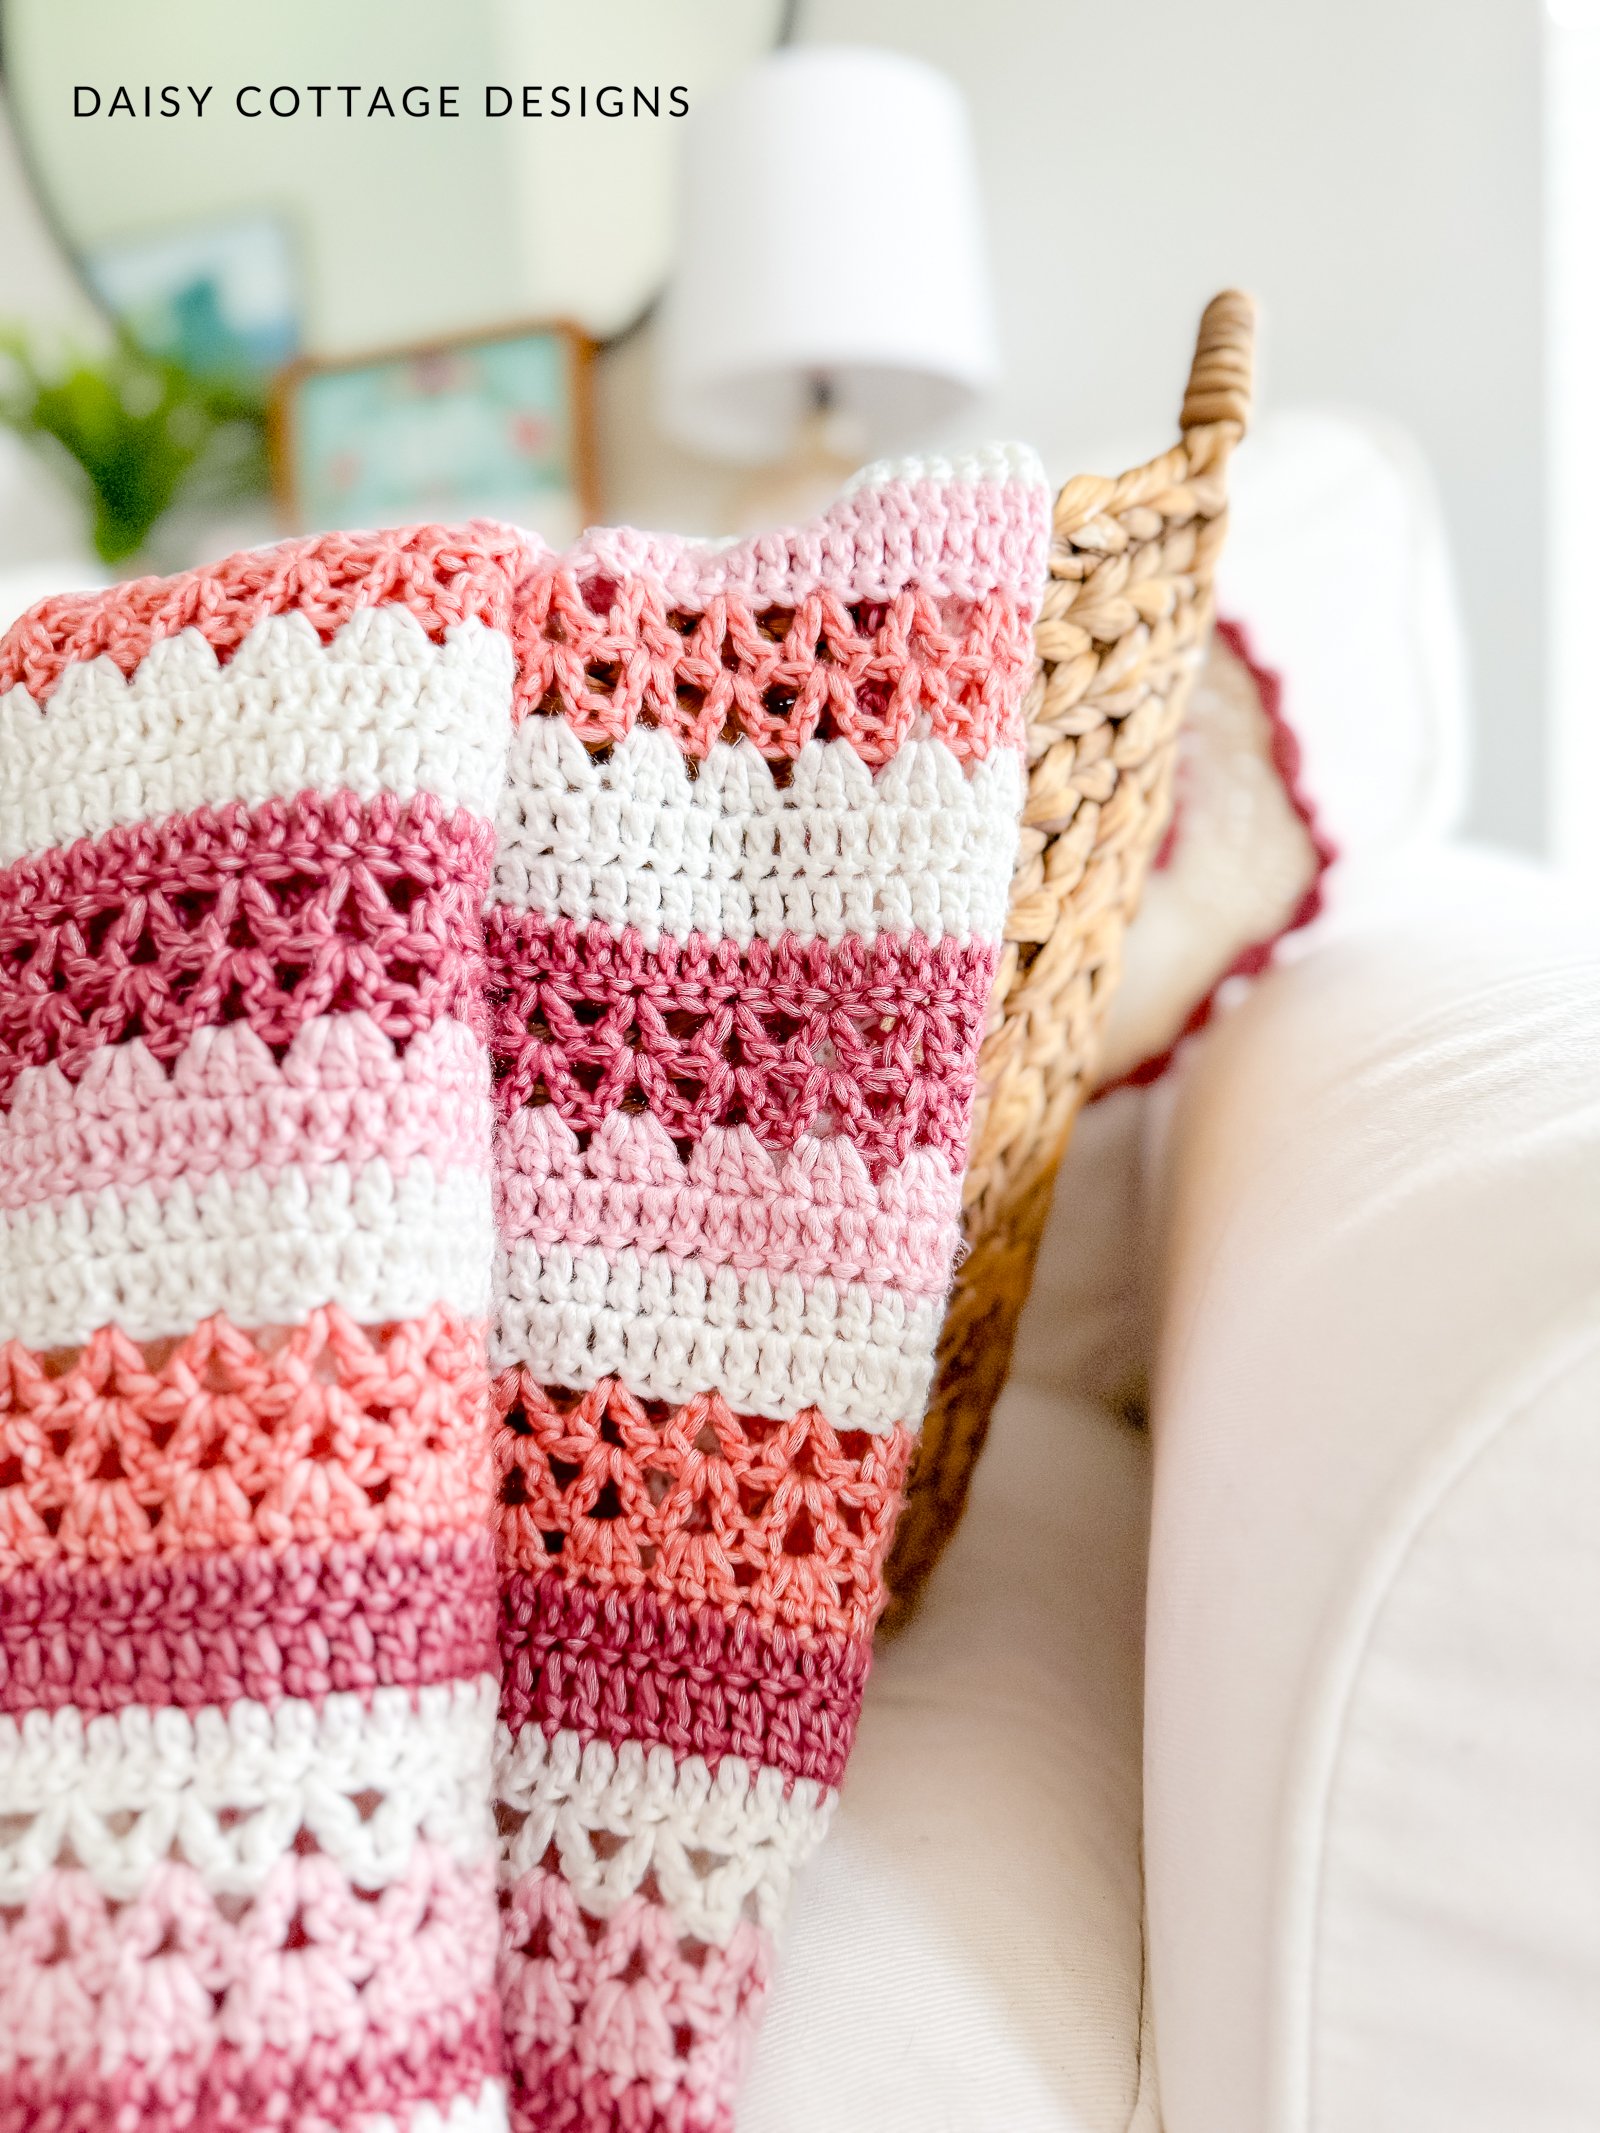
For this project, I challenged myself to think outside my usual color schemes (you’ll find that many of my projects feature some shade of the color blue). I went with shades of pink – ranging from coral to rose – paired with white. I couldn’t be happier with the results.
This blanket makes me smile every time I look at it.
About the Stitches
I wanted to use a combination of stitches for this blanket. After swatching several options, I decided to go with simple double crochet, v-stitch, and granny stitches. The way these came together created a blanket with gorgeous texture.
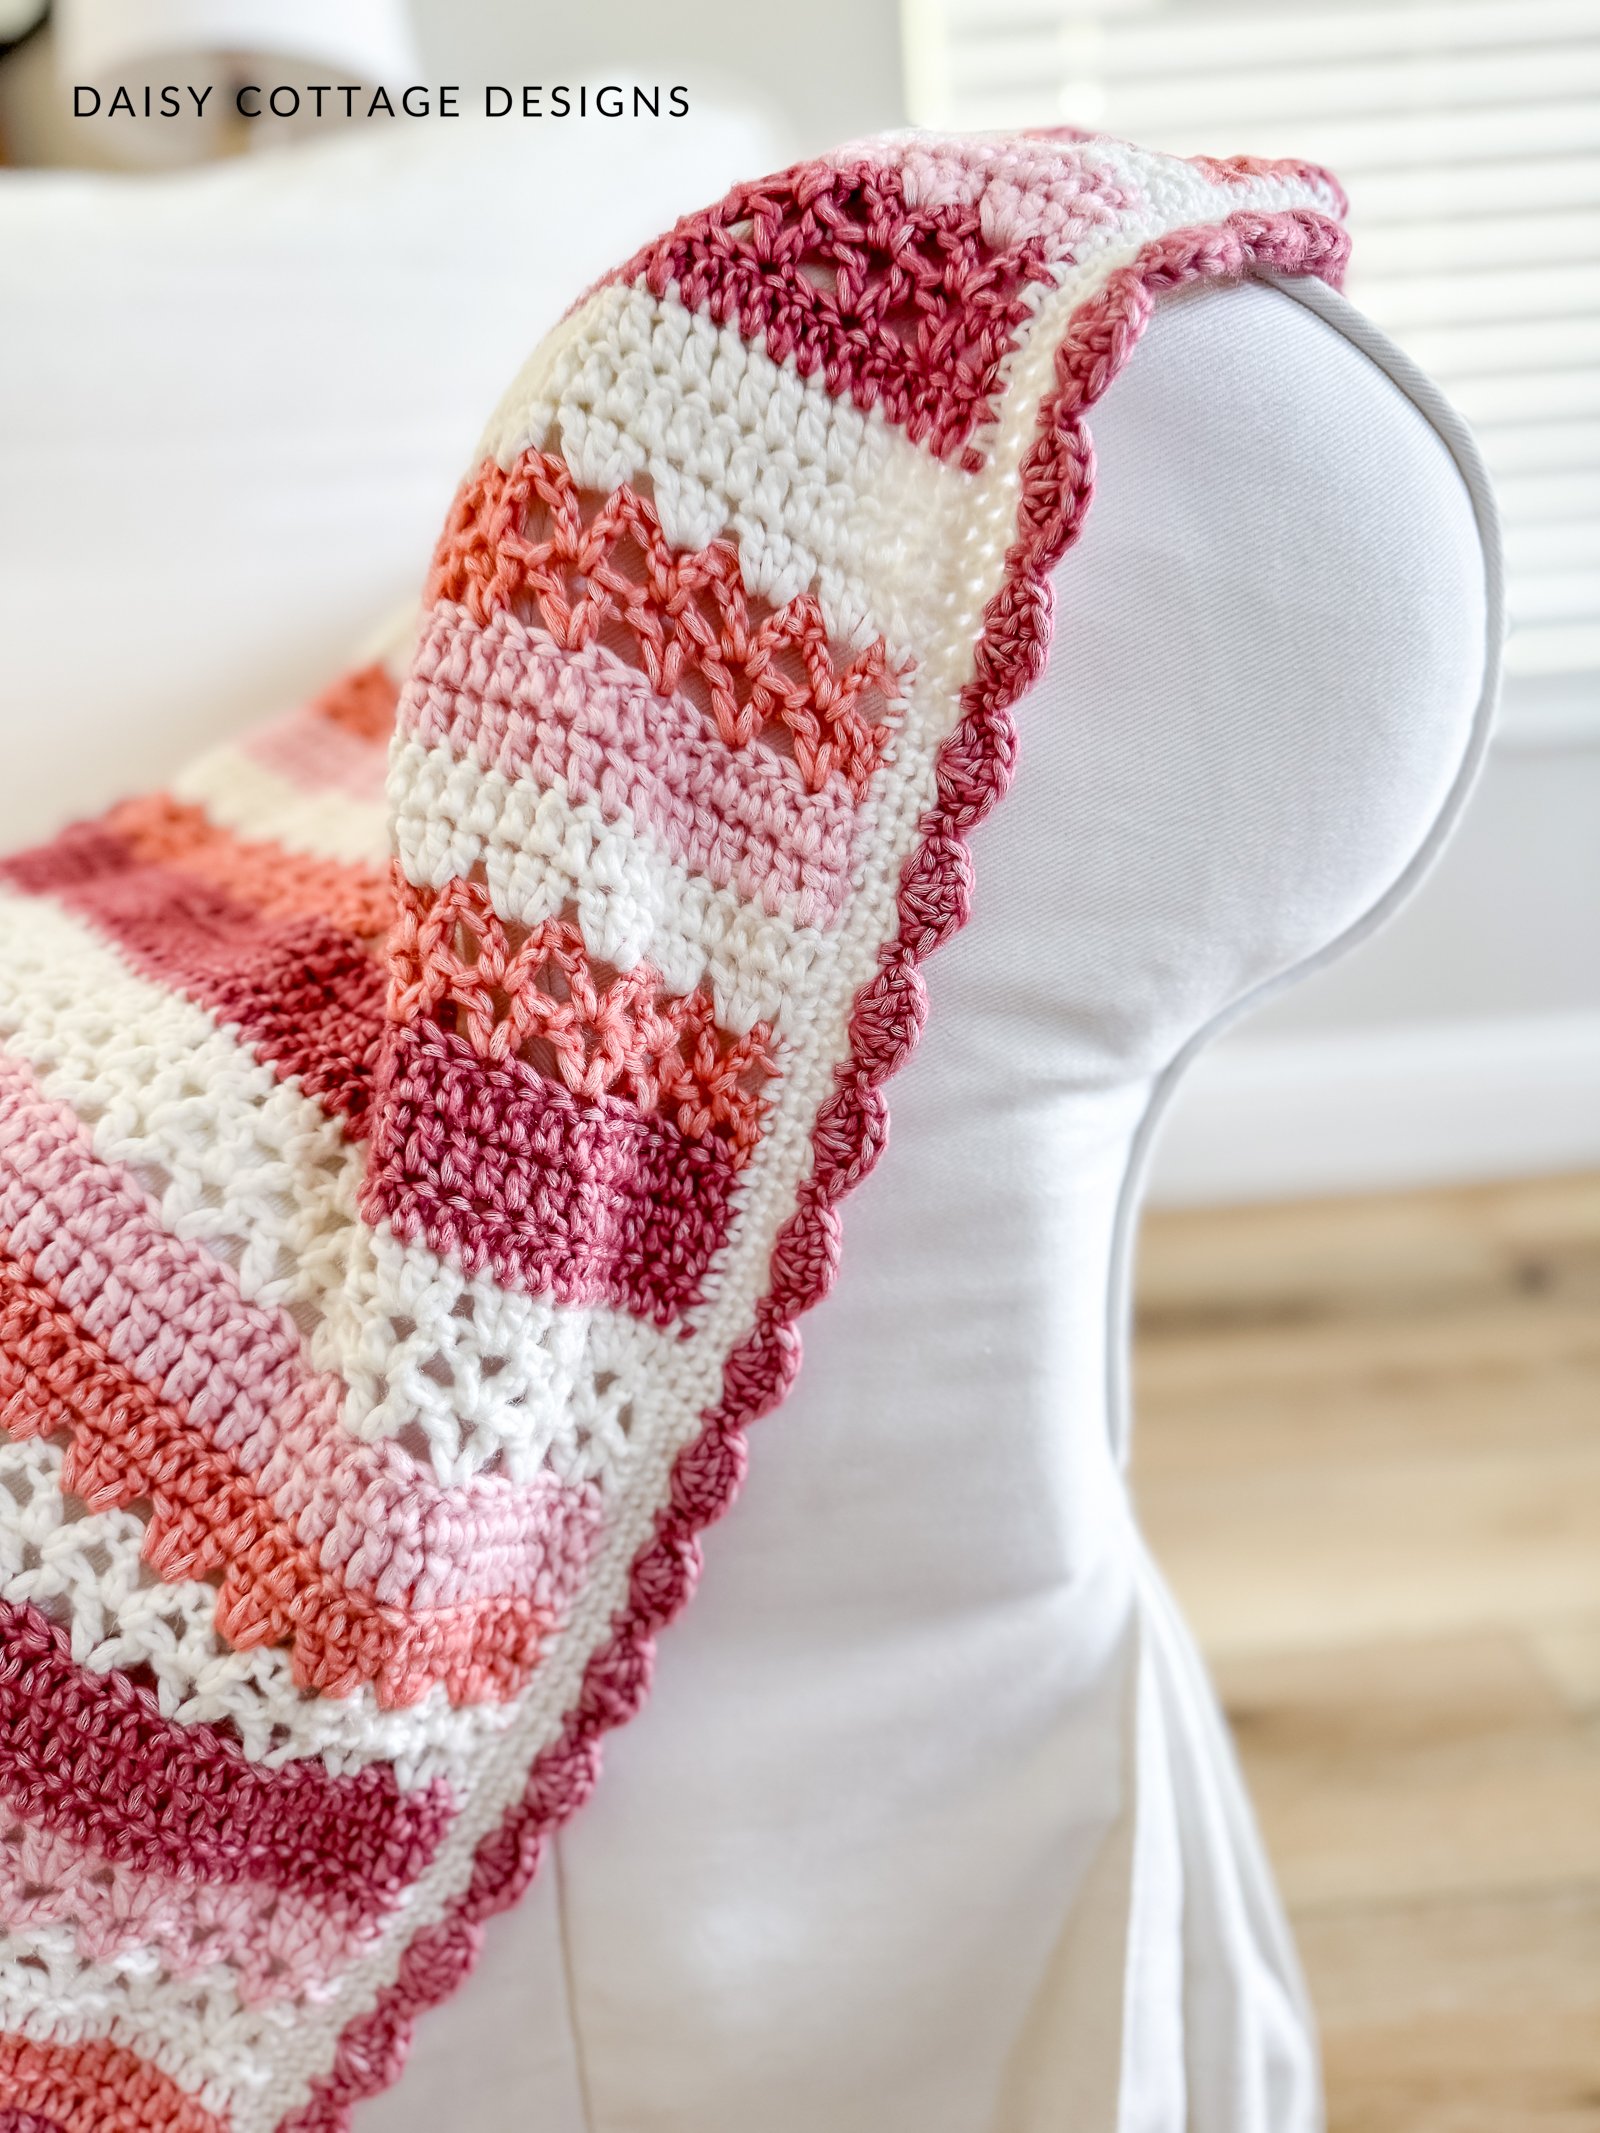
For the border, I wanted something a little more elaborate. I started off with 4 rounds of single crochet and framed it all with a shell-stitch border. If you’ve been around for a while, you know I typically stick with very simple borders. Somehow I just knew this blanket needed a little something more.
Even though these stitches might look intimidating, this blanket is beginner-friendly! If you can double crochet and chain, you can make this blanket!
The video tutorial will walk you through the stitches, changing colors, and the border!
About the Yarn
I discovered a new yarn recently and knew I wanted to use it for this project. I used Yarnsmith’s Pebble Haze Aran – it’s available from the Wool Warehouse website. I love the way this yarn works up, and it feels amazing, too!
This tubular yarn, which comes in 35 beautiful shades, is made with a soft, cotton-acrylic blend. I selected the colors Marble, Petalite, Coral, and Pink Smithsonite.
This post isn’t sponsored – I don’t even have an affiliate link to share – I just truly enjoy working with this yarn!
Yarn Substitutions
If you’re not in the mood to weave ends on your next project, don’t worry! This blanket looks every bit as beautiful worked in just one color (see my current project pictured below). You could also opt to work with a variegated yarn.
If you want to use a different yarn weight, this pattern will still work out just fine. Simply be sure to adjust the hook size.
As a rule of thumb, I recommend going up at least one hook size from what’s recommended on the package. But, just to be sure you like the texture, it’s always a good idea to work up a swatch.
The Raspberry Lattice Blanket Crochet Pattern
Materials
- J/10 (6.00 mm) Crochet Hook
- Approximately 775 yards of worsted weight yarn for the size shown. A chart is given for 9 other sizes.
- I used Pebble Haze Aran in the following shades:
- Marble (300 yd/3 skeins) – white shade
- Petalite (120 yd/2 skeins) – light pink shade
- Coral (115 yd/2 skeins) – coral shade
- Pink Smithsonite (240 yd/3 skeins) – dark pink/rose shade
- Tapestry needle and scissors for weaving ends.
Pattern Notes
- The blanket shown measures approximately 24”x33”. A chart with 9 other sizes is included.
- The turning chain does not count as a stitch in this project.
- If you crochet tightly, go up a hook size.
- Gauge is not important for this project.
- There is a video tutorial for this pattern available here.
Abbreviations
- ch – chain
- sc – single crochet
- dc – double crochet
- sl st – slip stitch
- sk – skip
- ** – Repeat what is written between the stars
Special Stitches
- V-Stitch – (dc, ch 1, dc) in the same stitch or ch 1 space.
Buy the print-friendly PDF on Etsy.
Blanket Instructions
Using Marble, Chain 84.
Row 1: dc in the second chain and in each ch across. Ch 1, turn. (You should have 83 dc at the end of this row.)
Rows 2-4: dc in the first st and in each st across. Ch 1, turn. (You should have 83 dc at the end of this row.)
You should now have 4 double crochet rows.
Row 5: dc in the first st, skip the next st. V-stitch in the next st. *skip the next 2 stitches, v-stitch in the next st* across until 2 stitches remain. Skip the next to the last st. dc in the last st. Ch 1, turn. (You should have 27 v-stitches and a dc on each end.)
Row 6: dc in the first st, v-stitch in each ch 1 space across. Dc in the last st. Ch 1, turn. (You should have 27 v-stitches and a dc on each end.)
You should now have 2 v-stitch rows.
Row 7: dc in the first st. Work 3 dc in each ch 1 space across. Dc in the last st. Ch 1, turn. (You should have 83 dc at the end of this row.)
You should now have 1 granny stitch row.
Rows 8-10: dc in the first st and in each st across. Ch 1, turn. (You should have 83 dc at the end of this row.)
You should now have 3 double crochet rows.
Repeat Rows 5-10 for a total of 58 rows. After Row 58, proceed to the border pattern without cutting yarn.
You’ll be alternating between the various stitches, as well as changing colors in this blanket. Your color changes and your stitch changes won’t necessarily line up. You might change colors on the second v-stitch row or in the middle of your dc rows. This adds to the fun of the pattern!
The Stripe Pattern is as Follows
- 4 Rows Rows Marble
- 3 Rows Rows Pink Smithsonite
- 2 Rows Rows Coral
- 2 Rows Marble
- 2 Rows Rows Petalite
- 3 Rows Pink Smithsonite
- 2 Rows Marble
- 2 Rows Coral
- 3 Rows Petalite
- 2 Rows Marble
- 2 Rows Pink Smithsonite
- 2 Rows Coral
- 2 Rows Marble
- 2 Rows Petalite
- 2 Rows Coral
- 2 Rows Marble
- 3 Rows Pink Smithsonite
- 2 Rows Petalite
- 2 Rows Rows Marble
- 3 Rows Coral
- 2 Rows Pink Smithsonite
- 2 Rows Marble
- 2 Rows Petalite
- 1 Rows Pink Smithsonite
- 4 Rows Marble
How to Change Colors
On the last stitch of the row, don’t pull your working yarn through the last two loops to complete the stitch. Instead of pulling the yarn you’ve been working with through those final two loops, place the new yarn on your hook and pull it through the last two loops. Be sure to leave a long tail on both colors so you can weave your ends later.
If you prefer video instructions, you can find those here.
Border Pattern
The border instructions begin around the 15 minute mark in the video tutorial.
Round 1: single crochet evenly around the entire blanket, working 3 sc into each corner. Sl st to the top of the first st to join.
Rounds 2 – 4: ch 1. Single crochet evenly around the entire blanket, working 3 sc into each corner. Sl st to the top of the first st to join. Cut yarn and weave ends.
Join Pink Smithsonite in any corner.
Round 5: Ch 1. Work 3 dc into the corner. *Skip one st, sc into the next st. Skip one st, 5 dc into the next st* around. You don’t have to worry about doing anything specific in the corner stitches. When you get back to the first corner, work two additional dc into the first corner st. Sl st to the first dc to join.
Adjusting the Size of the Blanket
Adjusting the size of this blanket is not difficult! In order for the pattern to work, your starting chain needs to be in a multiple of 3.
The total number of rows for this pattern needs to be a multiple of 6 + 4.
For example:
6 x 9 = 54 so 54 + 4 = 58
6 x 10 = 60 so 60 + 4 = 64
The chart below includes 10 common sizes. Stripe patterns for each size are given.
The stripe patterns for those sizes are listed below.
Lovey Size Stripe Pattern
- 4 Rows Marble
- 3 Rows Pink Smithsonite
- 2 Rows Coral
- 2 Rows Marble
- 2 Rows Petalite
- 3 Rows Pink Smithsonite
- 2 Rows Marble
- 2 Rows Coral
- 1 Rows Petalite
- 3 Rows Marble
- 3 Rows Pink Smithsonite
- 2 Rows Coral
- 4 Rows Marble
Stroller Size & Baby Blanket Size Stripe Pattern
- 4 Rows Marble
- 3 Rows Pink Smithsonite
- 2 Rows Coral
- 2 Rows Marble
- 2 Rows Petalite
- 3 Rows Pink Smithsonite
- 2 Rows Marble
- 2 Rows Coral
- 3 Rows Petalite
- 2 Rows Marble
- 2 Rows Pink Smithsonite
- 2 Rows Coral
- 2 Rows Marble
- 2 Rows Petalite
- 2 Rows Coral
- 2 Rows Marble
- 3 Rows Pink Smithsonite
- 2 Pink
- 2 Rows Marble
- 3 Rows Coral
- 2 Rows Pink Smithsonite
- 2 Rows Marble
- 2 Rows Petalite
- 1 Rows Pink Smithsonite
- 4 Rows Marble
Car Seat Size & Toddler Size Stripe Pattern
- 5 Rows Marble
- 3 Rows Pink Smithsonite
- 3 Rows Coral
- 3 Rows Marble
- 3 Rows Petalite
- 4 Rows Pink Smithsonite
- 3 Rows Marble
- 2 Rows Coral
- 3 Rows Petalite
- 3 Rows Marble
- 3 Rows Pink Smithsonite
- 3 Rows Coral
- 3 Rows Marble
- 2 Rows Petalite
- 2 Rows Coral
- 4 Rows Marble
- 3 Rows Pink Smithsonite
- 2 Rows Petalite
- 3 Rows Marble
- 3 Rows Coral
- 2 Rows Pink Smithsonite
- 3 Rows Marble
- 4 Rows Petalite
- 3 Rows Pink Smithsonite
- 4 Rows Marble
Crib Size Stripe Pattern
- 6 Rows Marble
- 3 Rows Pink Smithsonite
- 3 Rows Coral
- 4 Rows Marble
- 3 Rows Petalite
- 3 Rows Pink Smithsonite
- 4 Rows Marble
- 2 Rows Coral
- 3 Rows Petalite
- 5 Rows Marble
- 3 Rows Pink Smithsonite
- 5 Rows Coral
- 4 Rows Marble
- 3 Rows Petalite
- 5 Rows Coral
- 5 Rows Marble
- 3 Rows Pink Smithsonite
- 4 Rows Petalite
- 4 Rows Marble
- 3 Rows Coral
- 4 Rows Pink Smithsonite
- 4 Rows Marble
- 4 Rows Petalite
- 3 Rows Pink Smithsonite
- 6 Rows Marble
Throw Size Stripe Pattern
- 6 Rows Marble
- 4 Rows Pink Smithsonite
- 5 Rows Coral
- 6 Rows Marble
- 3 Rows Petalite
- 4 Rows Pink Smithsonite
- 6 Rows Marble
- 3 Rows Coral
- 4 Rows Petalite
- 7 Rows Marble
- 3 Rows Pink Smithsonite
- 5 Rows Coral
- 6 Rows Marble
- 4 Rows Petalite
- 5 Rows Coral
- 7 Rows Marble
- 4 Rows Pink Smithsonite
- 4 Rows Petalite
- 6 Rows Marble
- 3 Rows Coral
- 4 Rows Pink Smithsonite
- 6 Rows Marble
- 4 Rows Petalite
- 3 Rows Pink Smithsonite
- 6 Rows Marble
Twin, King, & Queen Size Stripe Pattern
- 7 Rows Marble
- 6 Rows Pink Smithsonite
- 7 Rows Coral
- 8 Rows Marble
- 5 Rows Petalite
- 6 Rows Pink Smithsonite
- 7 Rows Marble
- 5 Rows Coral
- 6 Rows Petalite
- 7 Rows Marble
- 5 Rows Pink Smithsonite
- 7 Rows Coral
- 8 Rows Marble
- 6 Rows Petalite
- 7 Rows Coral
- 8 Rows Marble
- 6 Rows Pink Smithsonite
- 6 Rows Petalite
- 7 Rows Marble
- 5 Rows Coral
- 6 Rows Pink Smithsonite
- 7 Rows Marble
- 6 Rows Petalite
- 5 Rows Coral
- 7 Rows Marble
Love this pattern! Thank-you for sharing. I also like it in the solid color that you displayed. Can you tell me what yarn was that, and what color?
Hi, Rachelle. It’s Berrocco Vintage in the shade Oats 🙂
Daisy Cottage Designs. I fell upon your website by accident when looking for the perfect baby blanket. I just love all the patterns you have produced for your followers. I’m currently on my second blanket, the first was the blanket with berry stitch and the one above is my second. I love how you write the patterns. So easy to follow. Thank you so much!!
Thanks, Jane! I’m so glad you’re here!
I am relatively new to crochet… in the last 7-8 yrs and I have taught myself. I always end up coming back to your patterns and color rotations! love all of the freshness you bring.
question is whether the double crochets go on top of the previous stitch, or in the channel beside it. basically the same, but it’s not?
anyway, great work
your eternal friend 💞
The double crochets are worked into the tops of the stitches. 🙂
I don’t know what I am doing wrong. My project looks like an upside down smile. I started twice and got same results.
Hi, Jeannie. Oh no. If you send me an email (lauren@daisycottagedesigns.net) with a photo, I’d be happy to try to help.
Love this pattern! 💕. Thank you. I can see this as a pocket shawl sldoy
I am going to try to crochet this pattern as a shawl. I understand the chain multiple but l don’t understand the rows multiple.
Do you think a shawl would work with this pattern?
Yes, definitely. I think all you’ll need to know is to end with a full double crochet section 🙂
Love this pattern!
Alas, I found an error in the Stroller Size & Baby Blanket Size Stripe Pattern. Near the end (8th entry from the bottom of the stripe pattern, the entry says, “2 Rows Pink” This doesn’t make sense as the row above it is Pink Smithsonite. What should the row color be?
Many thanks!
Alice K.
Hi, Alice. Thanks for letting me know. It should say Petalite 🙂
I’m looking forward to making this afghan but in another set of colors. Moss green, light blue, lavender and white. I know I start with white but any suggestions on which color comes next?
Hmm. I think I’d go with white then green 🙂
I love this, I love the colors and I love the different crochet stitches used .
Thanks, Monica!
Beautiful pattern. Love the colors. You have a great style of teaching. Being a visual learner I really appreciate that. Thanks for this wonderful project. Can’t wait to begin.
Thanks, Heather!
Love this pattern so much. I do have a question..:does the turning chain count as a double crochet. Also why do you only chain one at the end before turning.
I chained 126 so I should have 125 dc in each row?
The turning chain doesn’t count as a stitch. I chain 1 rather than 2 because I feel like that gives me a neater look. If you started with a chain of 126, you should have 125 dc stitches in each row.
Hope this helps!
Lauren
Thank you for sharing this pattern. I love it!
I think this is a nice pattern and I am going to try it! I always like your choice of color combinations. Please keep giving us ideas about color. Sometimes we get stuck in our blues!
The pattern does not tell us when to change colors on the larger sizes of blankets. How do I do that for the throw size?
Hey, Michelle! If you scroll to the bottom of the post, you should see the stripe patterns listed for all the sizes 🙂
Hi. I going to make this pattern using Bernat blanket yarn #6 Chenille. I have 3 10.5 oz 220yds skeins. I would like to make the size for car seat/ throw.
Can I use the same stitch count , 84 stitches even thought my yarn is larger.? I won’t be changing colors. Thank you for this pattern and your help . 😁
Hi, Lynn. I haven’t made a blanket using a weight 6 yarn so I’m honestly not sure how much you would need for the car seat/throw size. Being a different weight changes all the math 🙂
Hello there, I just wanted to know, does the 2 rows v-stitch, 1 row granny stitch, 3 rows DC pattern apply to all the blanket sizes? Or do I change the stitch according to the color pattern for the particular blanket size?
Thank you!
Nope, the stitch order stays the same! The colors change, but the stitch repeat stays the same.