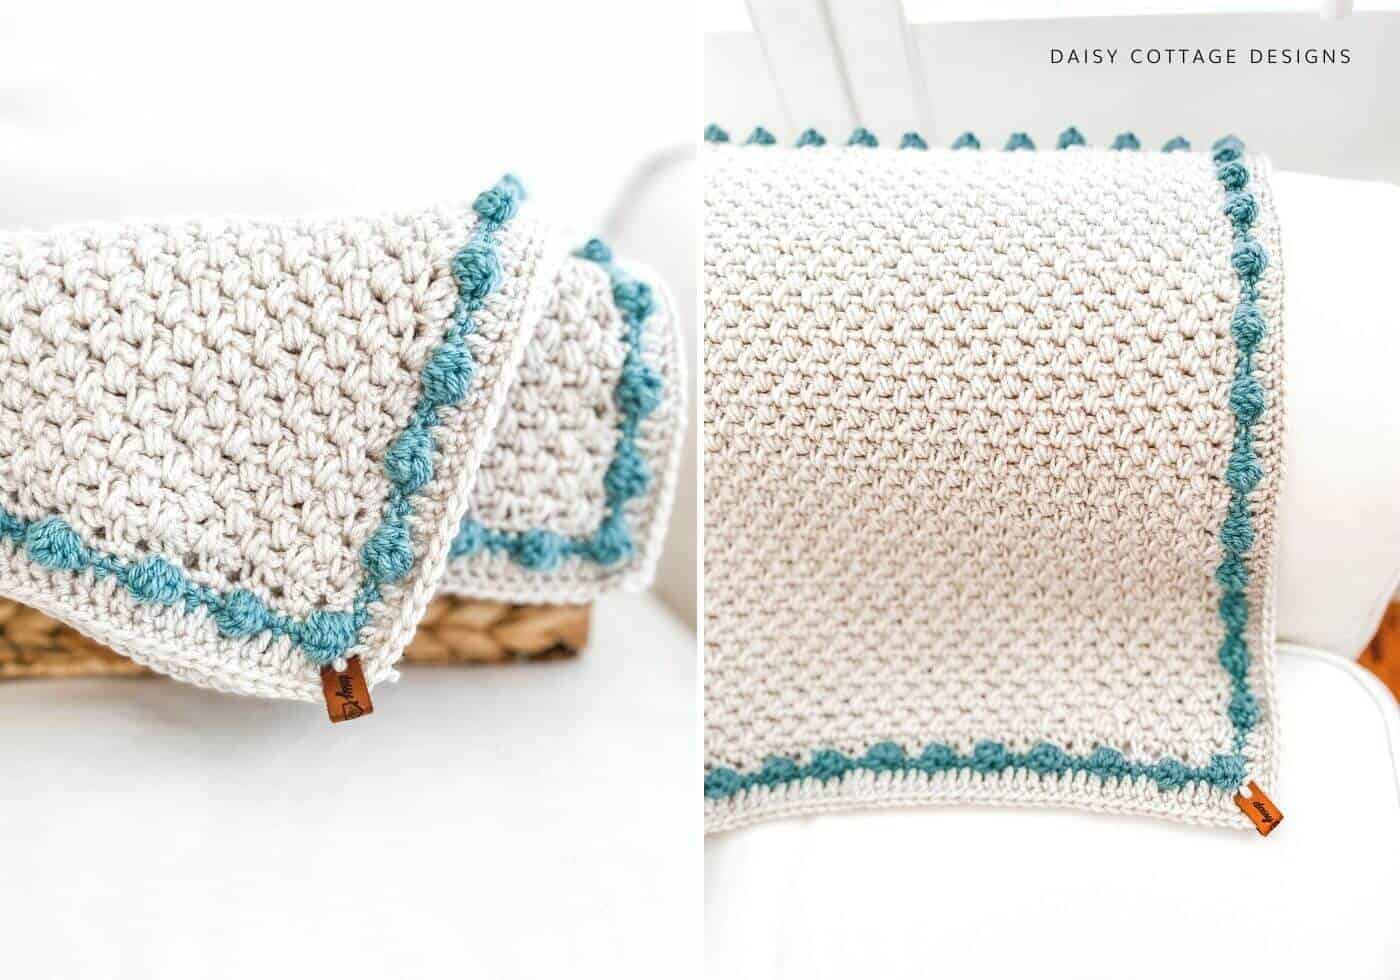
Modified Mini Bean Stitch Crochet Blanket Pattern, Peek-A-Blue Baby Blanket
The written instructions for this modified mini bean stitch crochet blanket (which one of my fans affectionately named the Peek-A-Blue Baby Blanket) is in the middle of this post.
Does anyone else feel like they have a lot of crochet baby blankets to make this year? It’s my goal to make a blanket for every friend who has a baby, but my people are making it pretty hard to keep up.
In fact, I’m behind.
While this mini bean stitch crochet blanket is written in four sizes, the smallest size is how this pattern started. I needed a quick gift for a friend and didn’t have time to make a full-size blanket.
If you don’t have time to make a full-size baby blanket for every baby shower, don’t let that stop you from getting crafty. A set of washcloths (use this dishcloth pattern), a small baby lovey, or a bib is just as good and will be just as treasured.
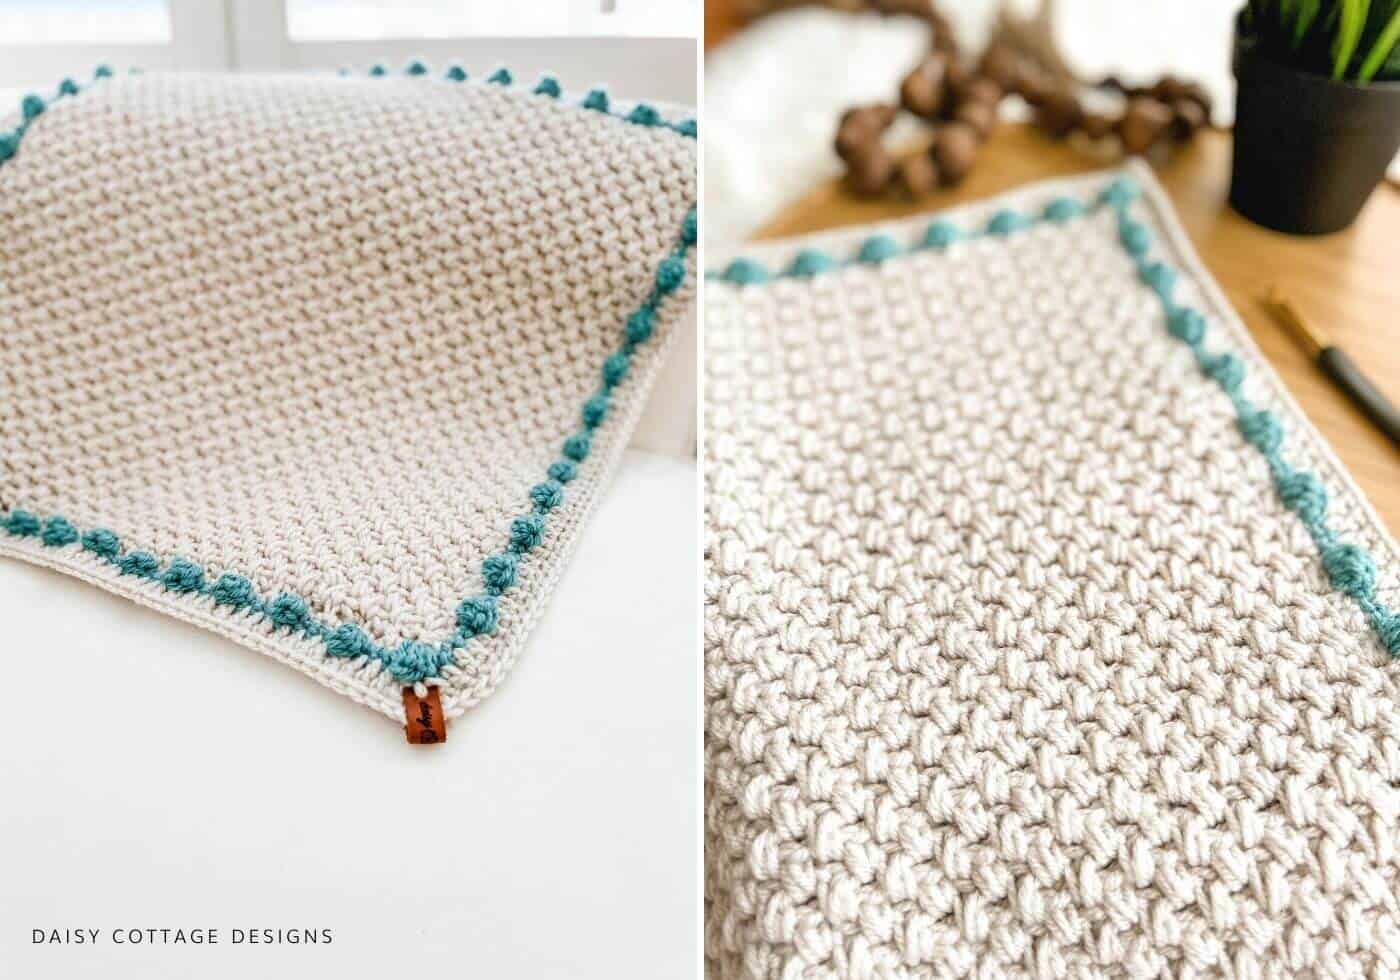
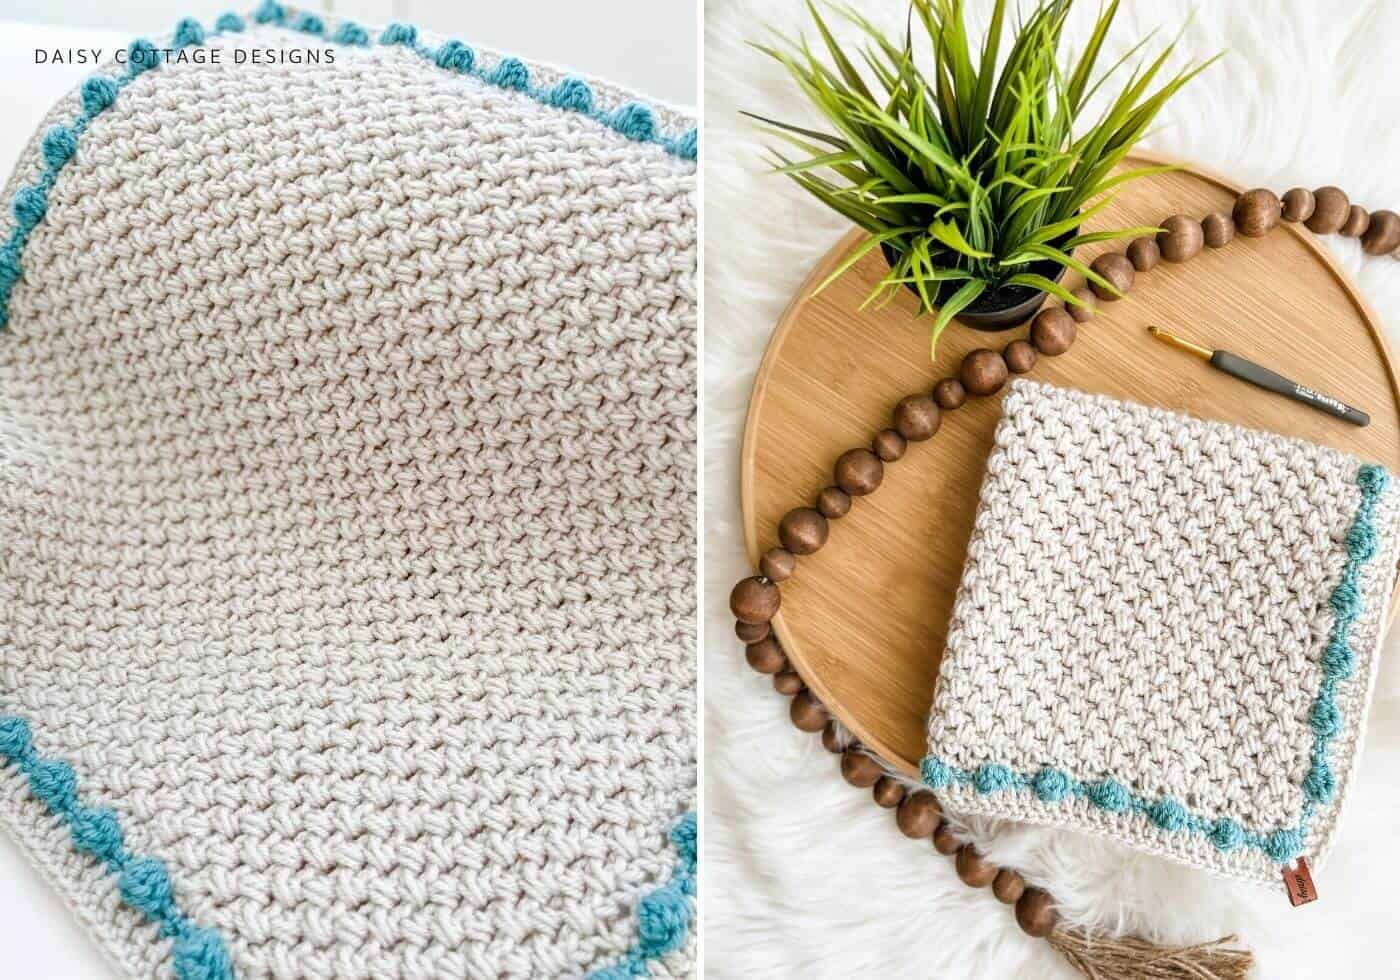
Even if you make the smallest size – the sweet little lovey blanket – you’ll have an heirloom piece with amazing texture. From your first to your last stitch, I think you’re going to love making this blanket!
Modified Mini Bean Stitch Crochet Blanket Pattern, “Peek-A-Blue Baby Blanket”
Not ready to make this blanket yet?
- Buy the ad-free, print-friendly version on Etsy.
- Pin it for later!
- Text the link to another fiend who crochets!
Materials:
- J/10 (6.00 mm) Crochet Hook
- Please see the size chart for yarn amounts.
- I used Hobby Lobby I Love This Yarn! in the shades Linen & Sea Blue.
- Stitch Markers (optional but helpful)
- Tapestry Needle & Scissors
- The ad-free pattern, if you prefer print-friendly PDFs
Pattern Notes:
- This pattern is written in 4 square sizes. Please see the chart below for size information.
- For this pattern, you will be working into the ch 1 spaces across and then into the second chain of a chain 2 at the end of each row.
- Marking your ch 2 on each row will help you see where to put your hook for your last stitch.
- For detailed instructions on how to create the stitch used throughout this blanket, please watch this video tutorial. It’s never a bad idea to make a small sample… I recommend making a modified mini bean stitch swatch before you get started.
- Instructions for the border are given below, and this video will walk you through the stitches.
Special Stitches:
- Mini Bean Cluster: Insert hook into the ch 1 space, pull up a loop. Yarn over, insert hook into same ch 1 space, pull up a loop. There will be four loops on your hook. Pull through all 4 loops on your hook.
- Dc4tog: yarn over, insert hook into the stitch, pull up a loop. Pull through the first two loops on your hook. Yarn over, insert hook into the same stitch, pull up a loop. Pull through the first two loops on your hook. Yarn over, insert your hook into the same stitch, pull up a loop. Pull through the first two loops on your hook. Yarn over, insert your hook into the same stitch, pull up a loop. Pull through the first two loops on your hook. Yarn over, pull through all five loops on your hook.
Modified Mini Bean Stitch Video Tutorial
Size Chart
| Blanket Size | Starting Chain | Number of Rows | Main Color Yardage | Bobble Yardage |
| 18” Square | 51 | 51 | 280 yd | 105 yd |
| 24” Square | 69 | 69 | 500 yd | 190 yd |
| 36” Square | 105 | 101 | 1125 yd | 430 yd |
| 45” Square | 131 | 127 | 1800 yd | 671 yd |
Using Linen, Chain 51 (or 69, 105, 131):
Row 1: mini bean cluster in the 3rd ch from hook. *ch 1, skip a stitch, mini bean cluster in the next stitch* across ending with a mini bean cluster in the last chain. Ch 2, turn.
Row 2: *mini bean cluster, ch 1* in each ch 1 space across. Work your final mini bean cluster around the ch 2 at the end of the row (insert your hook under the ch 2). Ch 2, turn.
Rows 3 – 50: repeat row 2.
Row 51: *mini bean cluster, ch 1* in each ch 1 space across. Work your final mini bean cluster around the ch 2 at the end of the row (insert your hook under the ch 2). Ch 1, turn.
Proceed to the border pattern without cutting yarn.
Bobble Border Pattern: (video available here)
Round 1: sc in each stitch around the blanket. Work sc, ch 2, sc in each corner stitch.
Cut yarn and weave ends.
Join sea blue in any corner stitch.
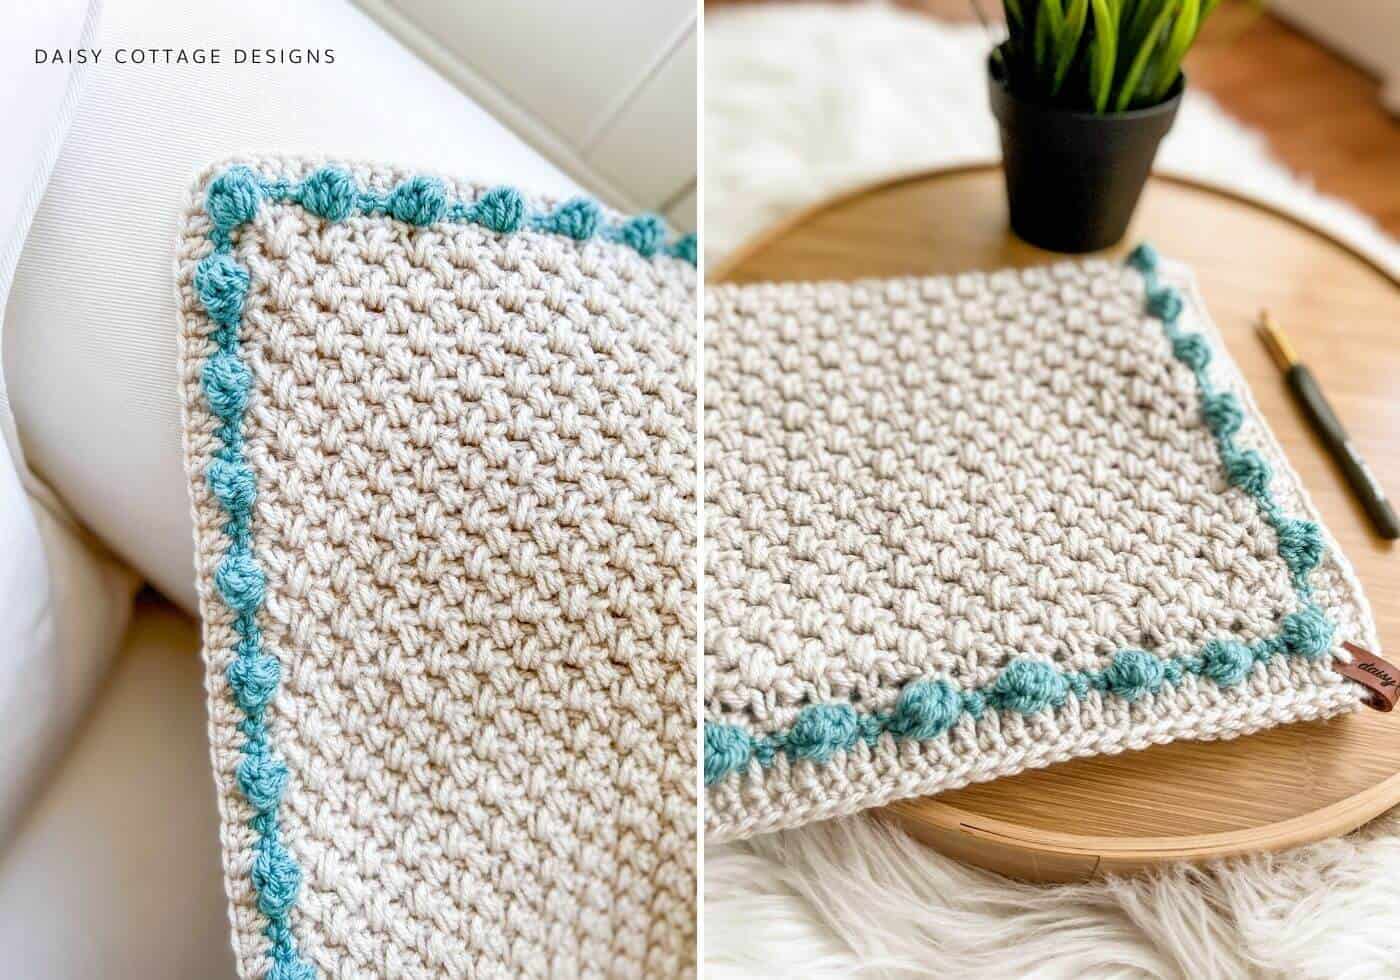
Round 2: Ch 1, *sc, dc4tog, sc* in the corner stitch. *Sc in the next 3 stitches, dc4tog* across to the next corner. Work *sc, dc4tog, sc* in each corner stitch and *sc in the next 3 stitches, dc4tog* across each edge. Sl st to the top of the first sc to join.
Cut yarn and weave ends.
Note: Depending on how many sc you worked along your edges, you might be a stitch short or have an extra stitch… you won’t notice if there are only two stitches between a couple of bobbles, or if you have to add a fourth sc to get to a corner.
Turn your work over (you want to work into the side where the bobbles are popping out). Join Linen in any corner stitch.
Round 3: Ch 2, *dc, ch 2, dc* in the same corner stitch. Dc in each stitch around the blanket. Work *dc, ch 2, dc* in each corner. Sl st to the top of the first dc to join.
Round 4: Ch 1, sc in each stitch around the blanket. Work *sc, ch 2, sc* in each corner.

Thank you so much for using Daisy Cottage Designs patterns! I’d be so happy if you’d tag me in any of your social media posts about this blanket. Use #daisycottagedesigns or tag me (@daisycottagedesigns) on Facebook or Instagram.